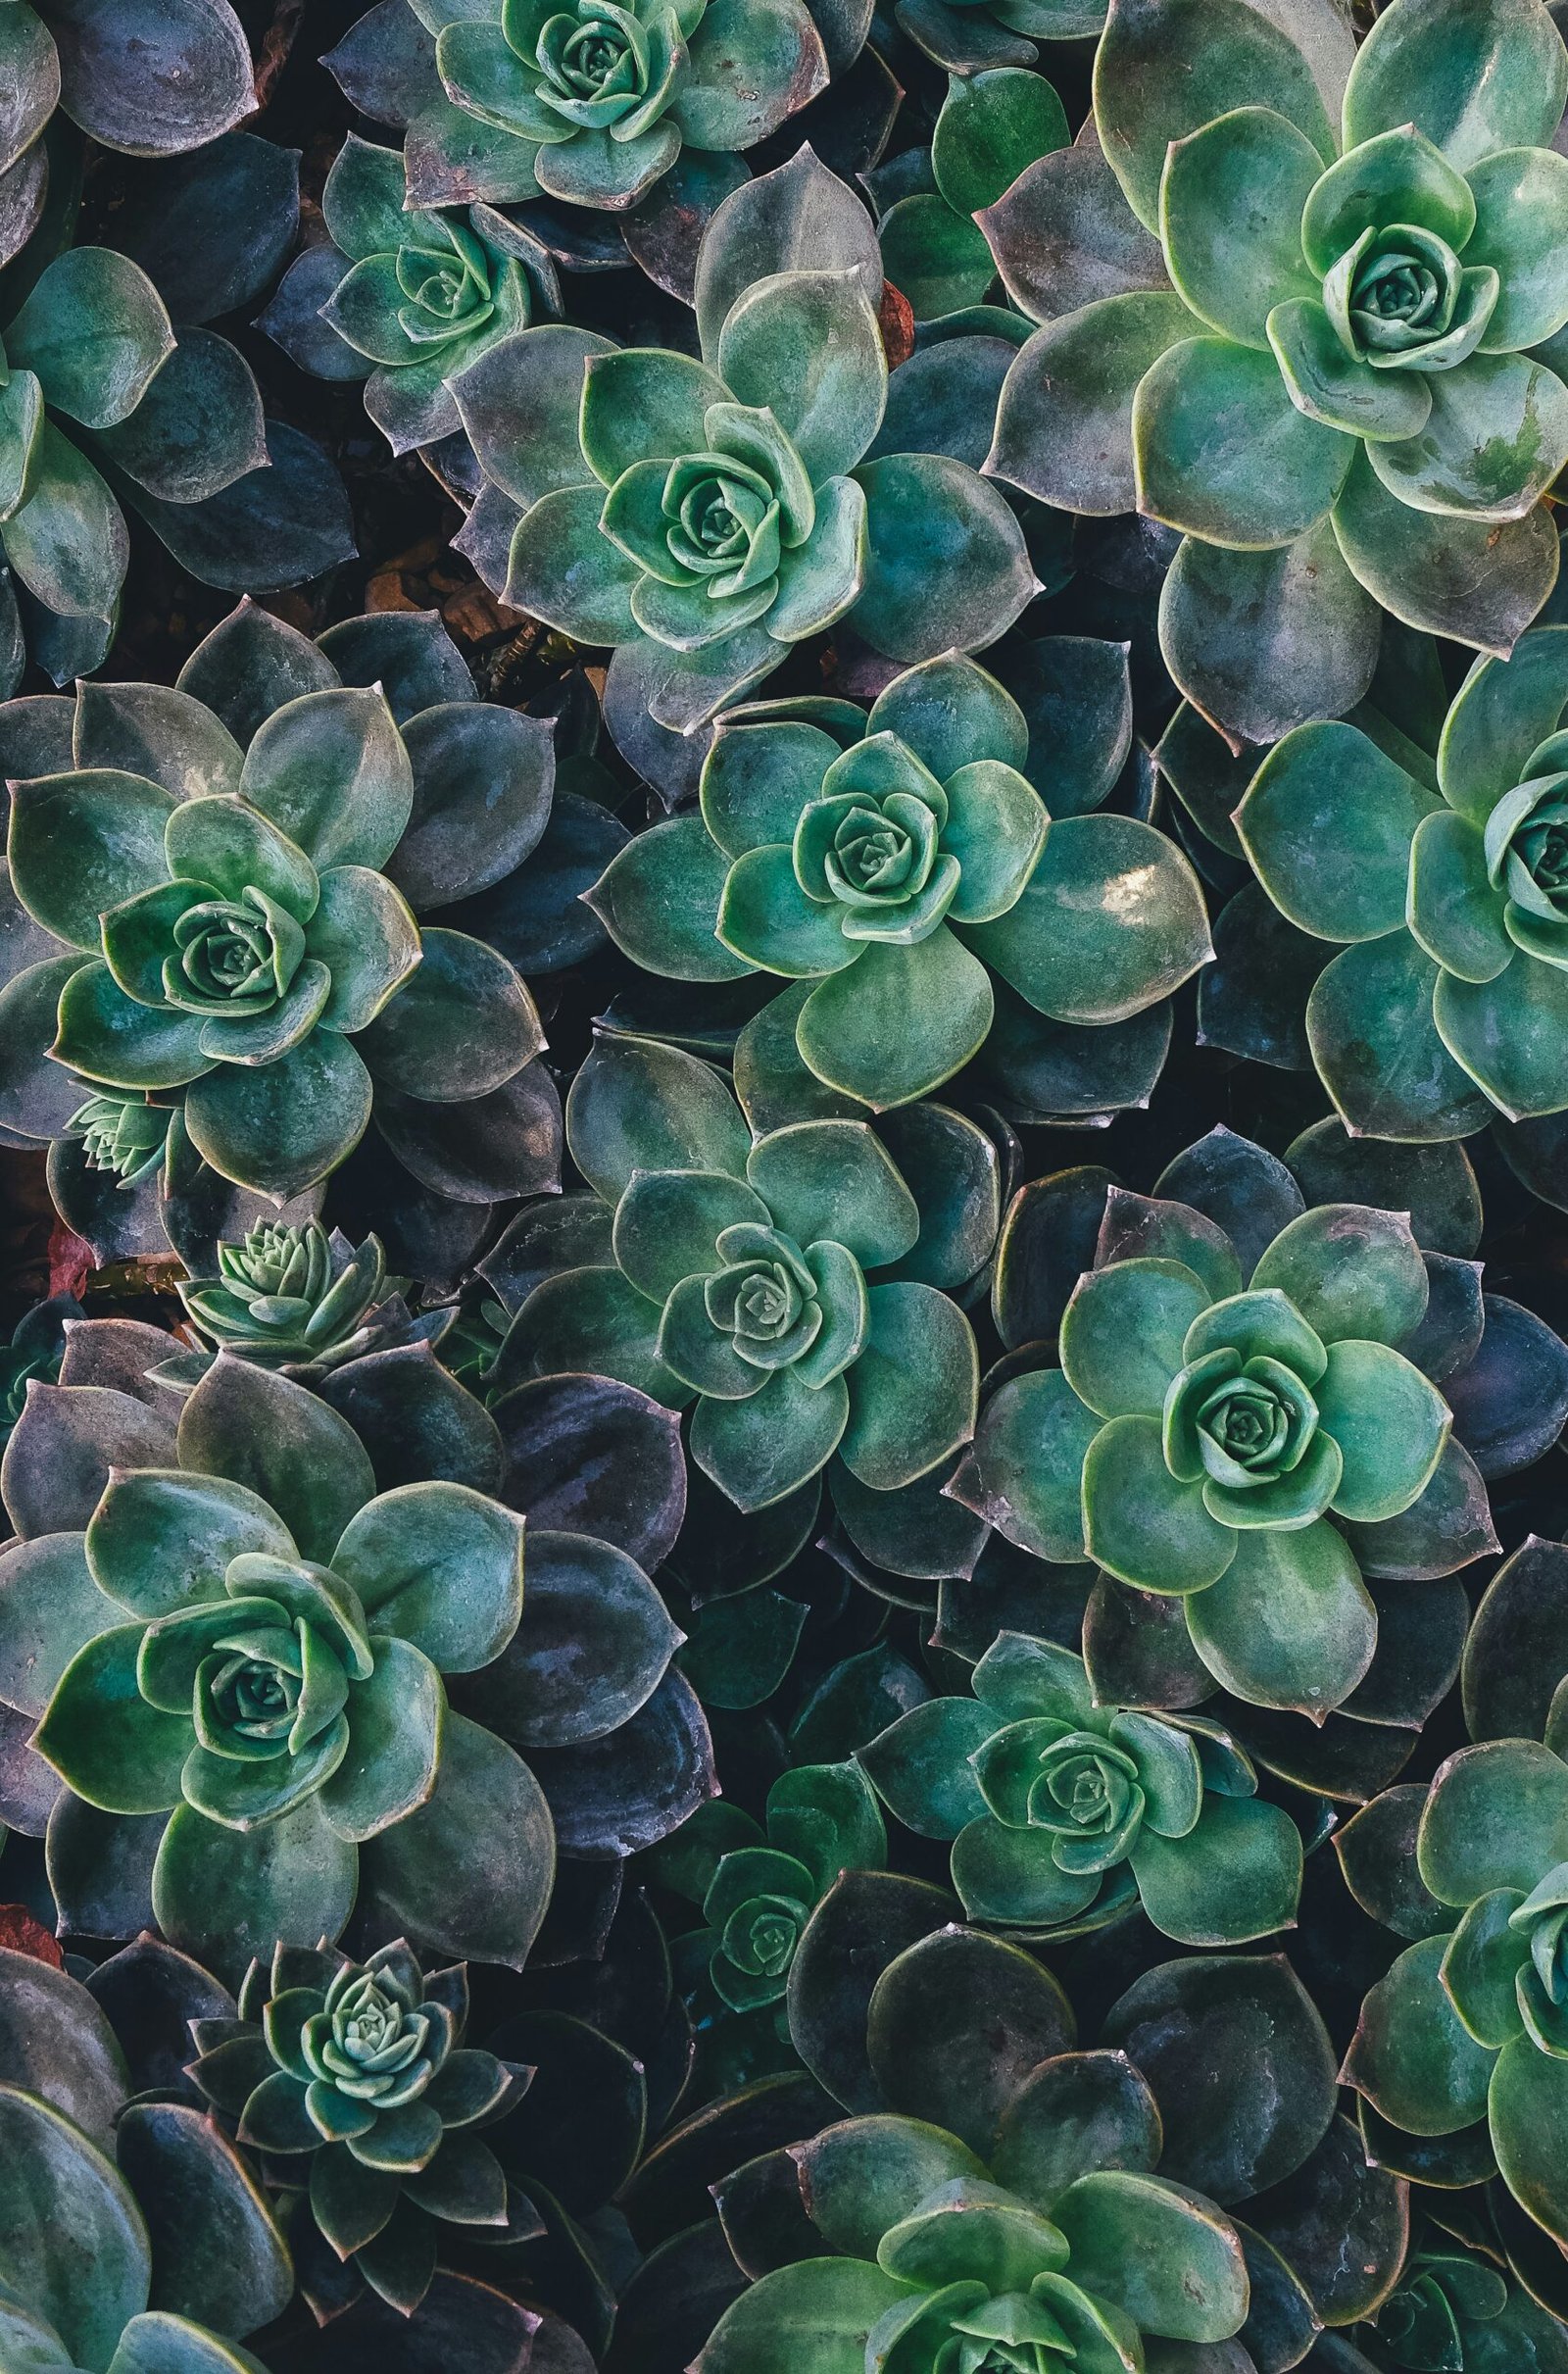
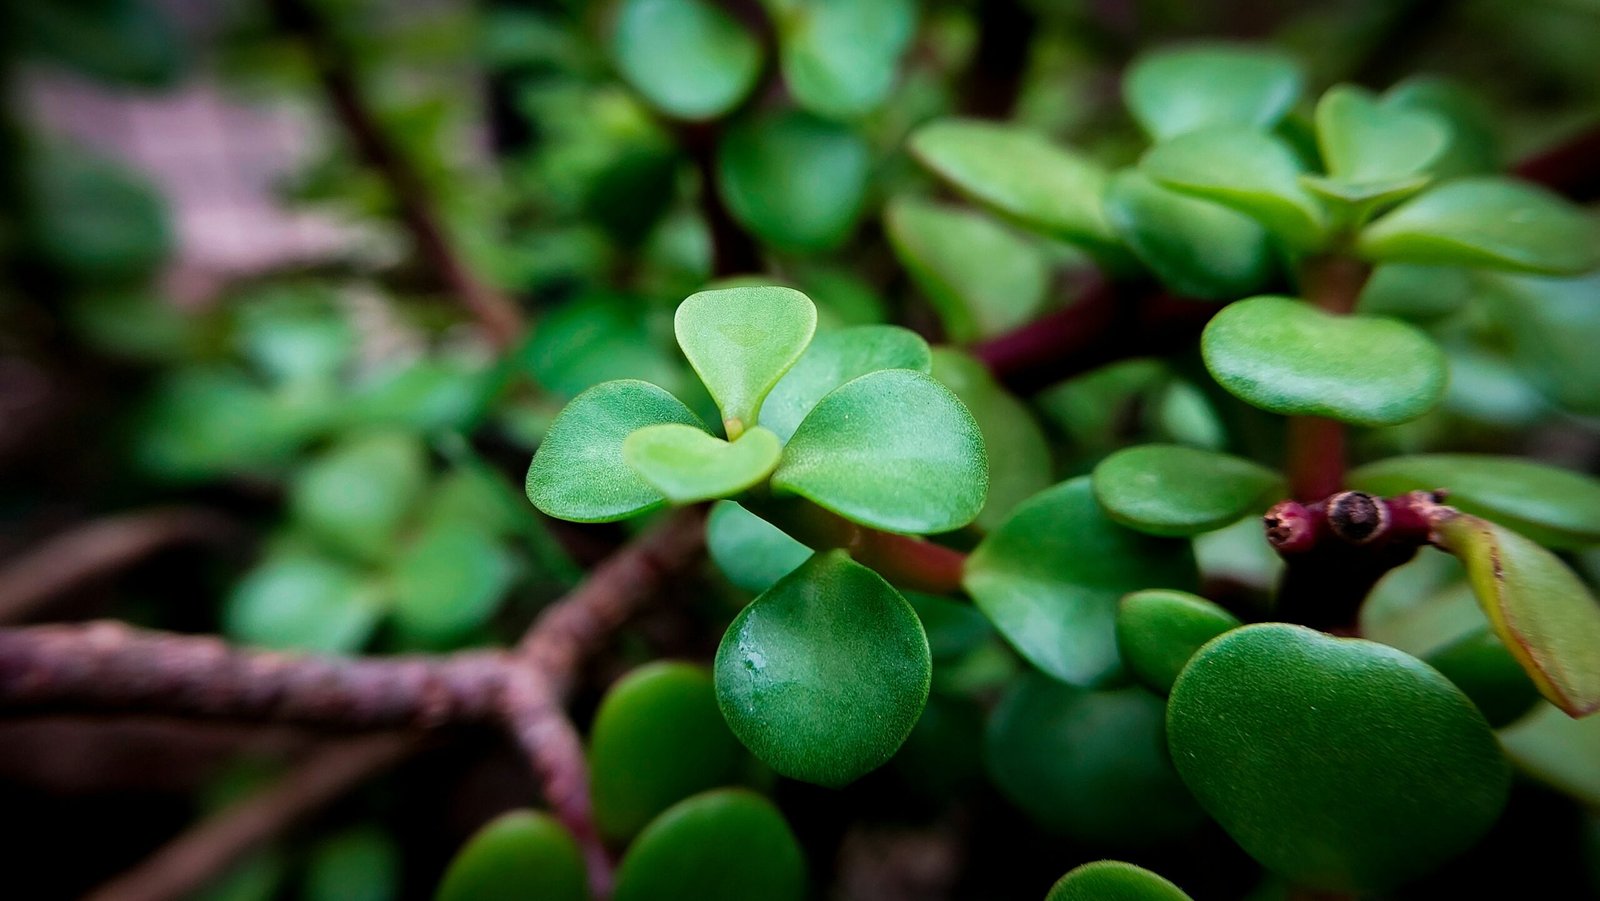
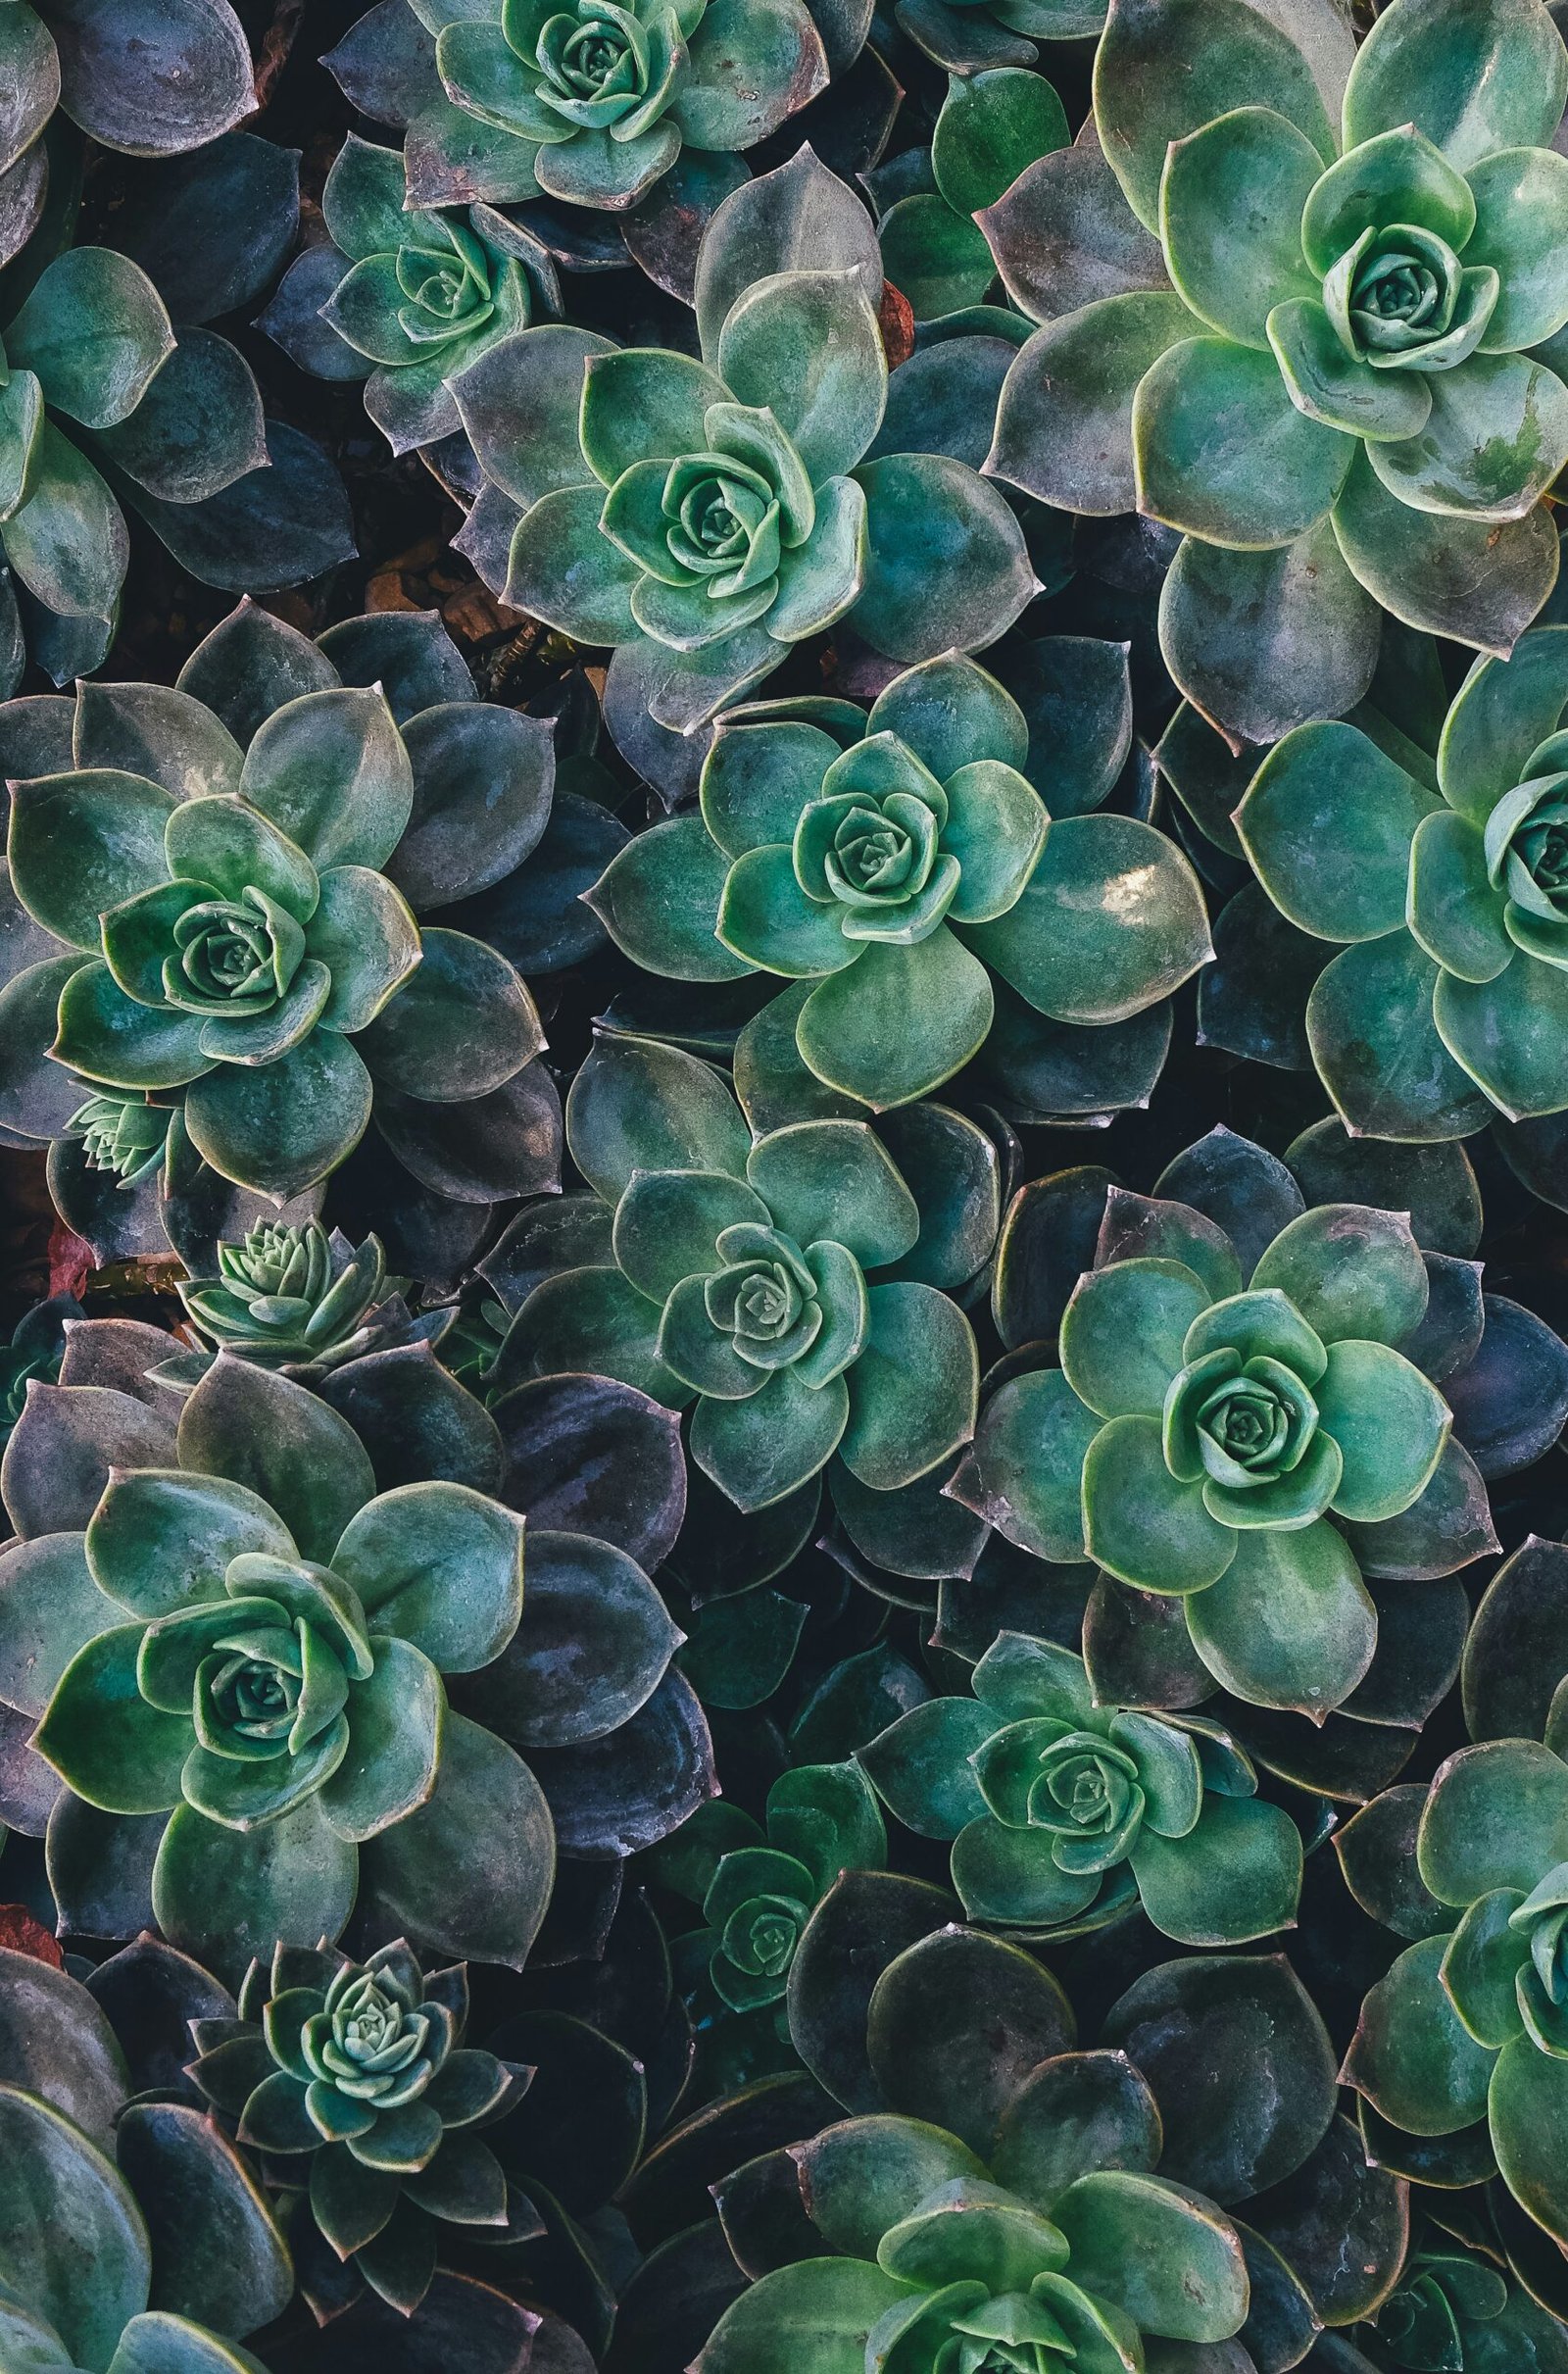
top view of green succulent plants

Using Grow Lights to Maximize Succulent Growth

Succulents and Grow Lights: A Perfect Match for Thriving Plants

Are you a plant lover looking to add some greenery to your space? Succulents are a great choice for both beginners and experienced gardeners. These hardy plants are known for their unique shapes and ability to thrive in various conditions. One key factor in their success is the proper use of grow lights. In this blog post, we will explore the benefits of using grow lights for succulents and provide some tips on how to effectively incorporate them into your plant care routine.

When it comes to succulents, providing them with adequate light is crucial for their growth and overall health. While these plants can tolerate low light conditions, they will thrive and display their vibrant colors when exposed to bright, indirect light. This is where grow lights come into play. Grow lights are artificial light sources that emit specific wavelengths of light, designed to mimic the sun’s natural spectrum. By using grow lights, you can ensure that your succulents receive the right amount and quality of light they need to flourish.

There are several benefits to using grow lights for your succulents. Firstly, grow lights allow you to control the amount and duration of light your plants receive. This is especially useful if you live in an area with limited sunlight or if your space doesn’t have access to natural light sources. With grow lights, you can provide your succulents with consistent light throughout the day, ensuring they receive the optimal amount of light for photosynthesis.

Furthermore, grow lights offer flexibility in terms of placement. Unlike natural light sources, which are often limited to specific areas in your home or garden, grow lights can be strategically positioned to provide light to your succulents, wherever they are located. This means that you can create a dedicated succulent corner or display, regardless of the availability of natural light in that particular spot.

When choosing grow lights for your succulents, it is important to consider the specific light requirements of these plants. Succulents generally prefer bright, indirect light, so opt for grow lights that emit a full spectrum of light or those with a balanced ratio of blue and red lights. Blue light promotes compact growth and enhances leaf coloration, while red light stimulates flowering and overall plant development.

Incorporating grow lights into your succulent care routine is relatively simple. Start by determining the light requirements of your specific succulent varieties. Some succulents, such as Echeveria and Sedum, prefer more light than others. Once you have identified their light needs, choose a suitable grow light that provides the right intensity and spectrum. Position the grow light above your succulents, ensuring that it is placed at the appropriate distance to prevent burning or damage to the plants.

Remember to adjust the duration of light exposure based on the natural light conditions in your space. Succulents generally require around 10–12 hours of light per day, but this can vary depending on the species and time of year. Monitor your plants closely and make adjustments as needed to ensure they are receiving the optimal amount of light.

By incorporating grow lights into your succulent care routine, you can create an ideal environment for your plants to thrive. Whether you are a beginner or an experienced gardener, the use of grow lights will enhance the growth, coloration, and overall health of your succulents. So why not give it a try and watch your succulents flourish under the gentle glow of artificial light?

5. Consistent Light Source

One of the main advantages of using grow lights for succulents is that they provide a consistent light source. Unlike natural sunlight, which can vary in intensity and duration depending on the time of year and weather conditions, grow lights offer a reliable and stable source of light for your plants. This consistency is especially beneficial for succulents, as it allows them to maintain a steady rate of photosynthesis and growth.

6. Extended Growing Season

By using grow lights, you can extend the growing season for your succulents. In regions with short summers or harsh winters, it can be challenging to keep succulents alive and thriving outdoors. However, with the help of grow lights, you can create an artificial growing environment that mimics the ideal conditions for your plants. This means you can enjoy the beauty of your succulents year-round, regardless of the climate outside.

7. Versatility in Placement

Grow lights offer versatility in terms of placement. Unlike natural sunlight, which is limited to specific areas in your home or garden, grow lights can be positioned wherever you need them. Whether you want to hang them from the ceiling, mount them on a stand, or attach them to a wall, you have the freedom to choose the most convenient and effective placement for your succulents.

8. Energy Efficiency

Modern grow lights are designed to be energy-efficient, making them a cost-effective option for indoor gardening. LED grow lights, in particular, consume less electricity compared to traditional fluorescent or incandescent lights. This means you can provide your succulents with the necessary light without worrying about high energy bills.

9. Customizable Light Spectrum

Grow lights allow you to customize the light spectrum according to the specific needs of your succulents. Different types of succulents have varying light requirements, and with grow lights, you can adjust the spectrum to match their preferences. For example, some succulents prefer a warmer light spectrum, while others thrive under cooler tones. By tailoring the light spectrum, you can optimize the growth and health of your succulents.

10. Easy Maintenance

Grow lights are generally low-maintenance, requiring minimal effort to keep them running smoothly. LED grow lights, in particular, have a long lifespan and do not require frequent bulb replacements. Additionally, most grow lights come with convenient features such as timers and dimmers, allowing you to automate the lighting schedule for your succulents.

In conclusion, grow lights offer numerous benefits for succulent enthusiasts. They provide a supplemental light source, give you control over light intensity and duration, promote compact and healthy growth, overcome space limitations, offer a consistent light source, extend the growing season, provide versatility in placement, are energy-efficient, allow for customizable light spectrum, and are easy to maintain. With these advantages, grow lights are an excellent investment for anyone looking to enhance the growth and beauty of their succulent collection.

Choosing the Right Grow Lights

Now that you understand the benefits of using grow lights for your succulents, let’s explore the different types of grow lights available:

1. LED Grow Lights

LED grow lights are a popular choice among indoor gardeners due to their energy efficiency and versatility. They produce a full spectrum of light that closely resembles natural sunlight, making them ideal for succulents. LED lights also emit little to no heat, reducing the risk of burning your plants.

LED grow lights have come a long way in recent years, with advancements in technology allowing for greater control over the light spectrum. You can now find LED lights specifically designed for succulents, providing the optimal wavelengths for their growth and development.

Another advantage of LED grow lights is their long lifespan. They can last up to 50,000 hours or more, which means you won’t have to replace them as frequently as other types of grow lights. This makes them a cost-effective option in the long run.

2. Fluorescent Grow Lights

Fluorescent grow lights, specifically T5 and T8 bulbs, are another option for growing succulents indoors. They are more affordable compared to LED lights and are available in different color temperatures. However, fluorescent lights tend to emit more heat, so it’s important to keep them at a safe distance from your plants to prevent overheating.

One advantage of fluorescent lights is that they are readily available and can be easily found at most hardware stores. They are also easy to install and can be used in a variety of setups, including hanging fixtures or fluorescent light stands.

When using fluorescent grow lights, it’s important to consider the color temperature. Succulents generally thrive under cool white or daylight bulbs, which provide a balanced spectrum of light. Avoid using warm white bulbs, as they have a higher proportion of red light, which can lead to elongated and leggy growth in succulents.

3. High-Intensity Discharge (HID) Grow Lights

HID grow lights, such as metal halide (MH) and high-pressure sodium (HPS) lights, are commonly used in commercial settings or for large-scale indoor gardening. While they can be effective for growing succulents, they tend to be more expensive and generate more heat. Adequate ventilation is crucial when using HID lights to prevent heat stress on your plants.

Metal halide lights emit a bluish-white light that is similar to natural daylight, making them suitable for all stages of plant growth. High-pressure sodium lights, on the other hand, emit a reddish-orange light that is more conducive to flowering and fruiting. Some gardeners use a combination of both types of HID lights to provide a balanced spectrum of light for their succulents.

When using HID grow lights, it’s important to monitor the distance between the lights and your plants. HID lights can be quite intense, and placing them too close to your succulents can lead to light burn and heat stress. It’s recommended to keep a distance of at least 12 to 18 inches between the lights and the top of your plants.

6. Provide Adequate Ventilation

When using grow lights, it’s important to ensure proper air circulation in your growing area. This will help prevent the buildup of heat and humidity, which can lead to fungal diseases and other issues. Install fans or open windows to promote air movement and maintain a healthy environment for your succulents.

7. Use a Reflective Surface

To maximize the efficiency of your grow lights, consider using a reflective surface around your plants. This can be a white or metallic material that reflects light back onto the succulents, increasing the overall light intensity. This is especially useful if you have a large growing area or if your plants are positioned away from the light source.

8. Water Succulents Appropriately

With the increased light intensity from grow lights, succulents may require more frequent watering. However, it’s important to avoid overwatering, as this can lead to root rot and other problems. Always check the moisture level of the soil before watering and adjust accordingly. Remember that succulents prefer well-draining soil and should be allowed to dry out between waterings.

9. Monitor for Signs of Light Stress

Even with the best care and lighting setup, succulents can sometimes show signs of light stress. This can manifest as pale or bleached leaves, elongated growth, or scorched spots on the foliage. If you notice any of these signs, adjust the light intensity or duration accordingly. It may take some trial and error to find the perfect balance for your specific succulents.

10. Gradually Introduce Grow Lights

If you are transitioning your succulents from natural sunlight to grow lights, it’s important to do so gradually. Start by placing them under the grow lights for a few hours each day and gradually increase the duration over a week or two. This will help prevent shock and allow the plants to acclimate to the new light source.

By following these tips, you can ensure that your succulents thrive under grow lights and continue to grow and flourish throughout the year. Remember to regularly monitor their progress and make adjustments as needed to provide the best possible growing conditions.

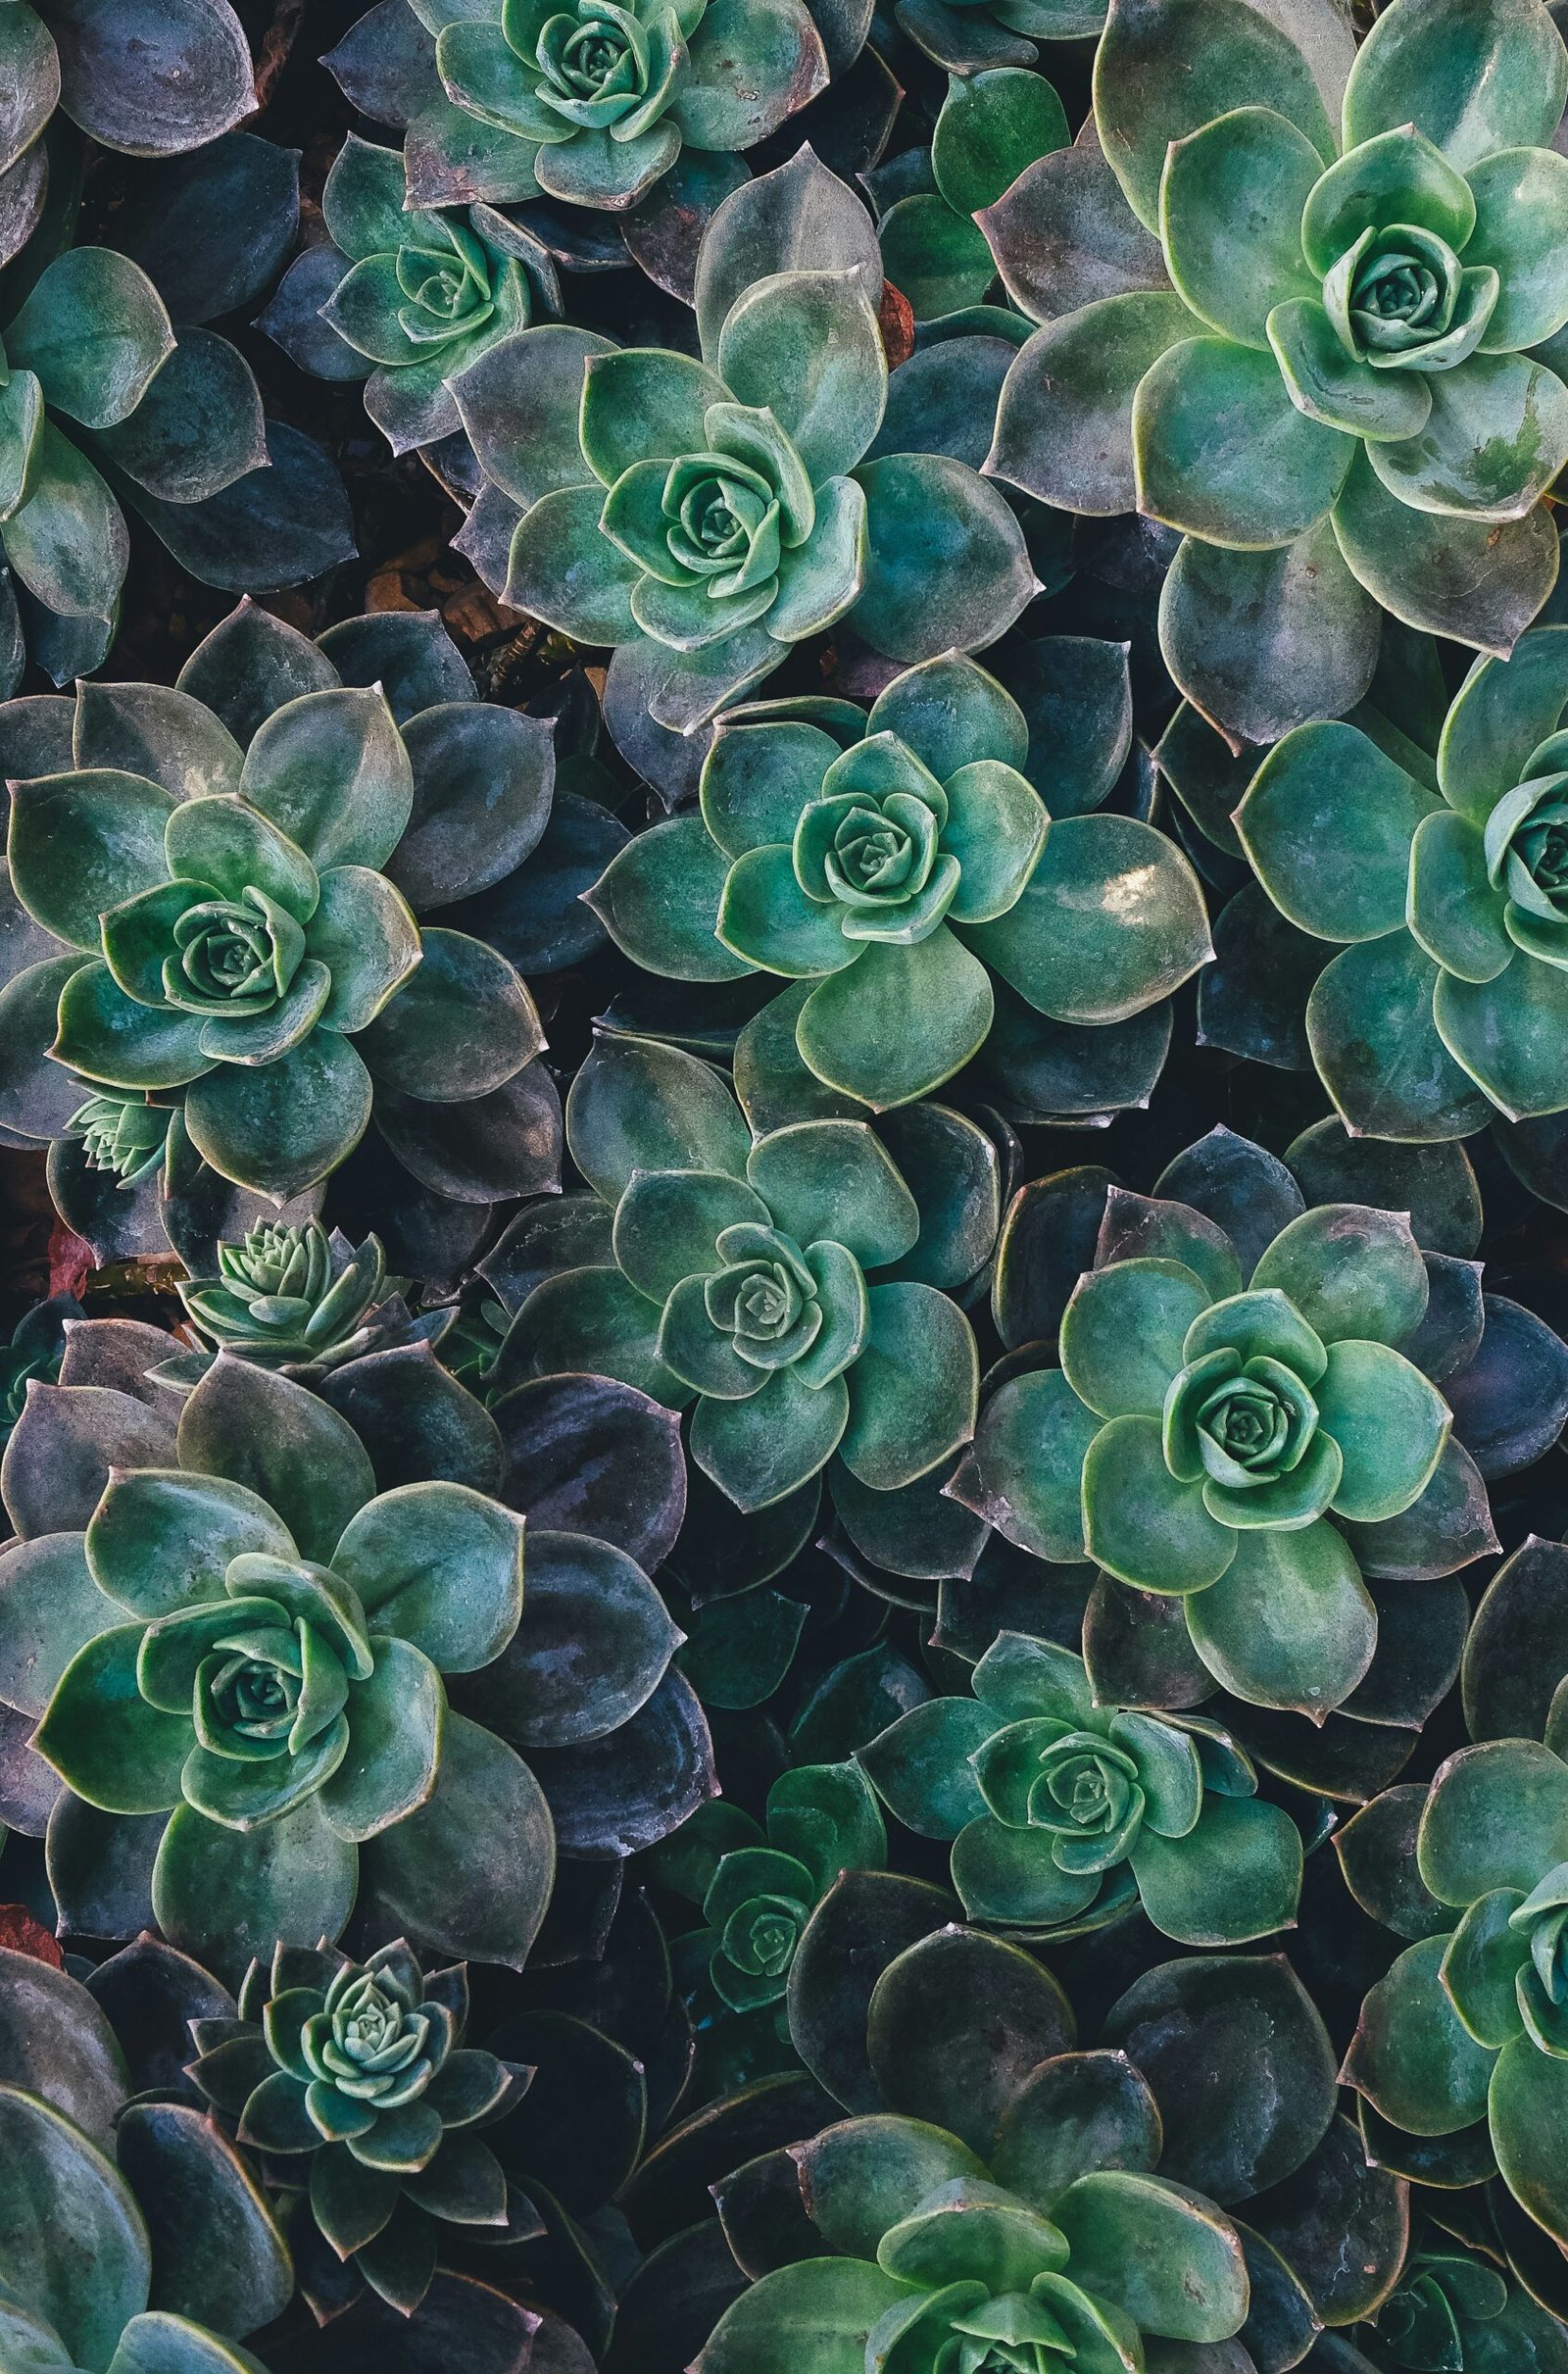
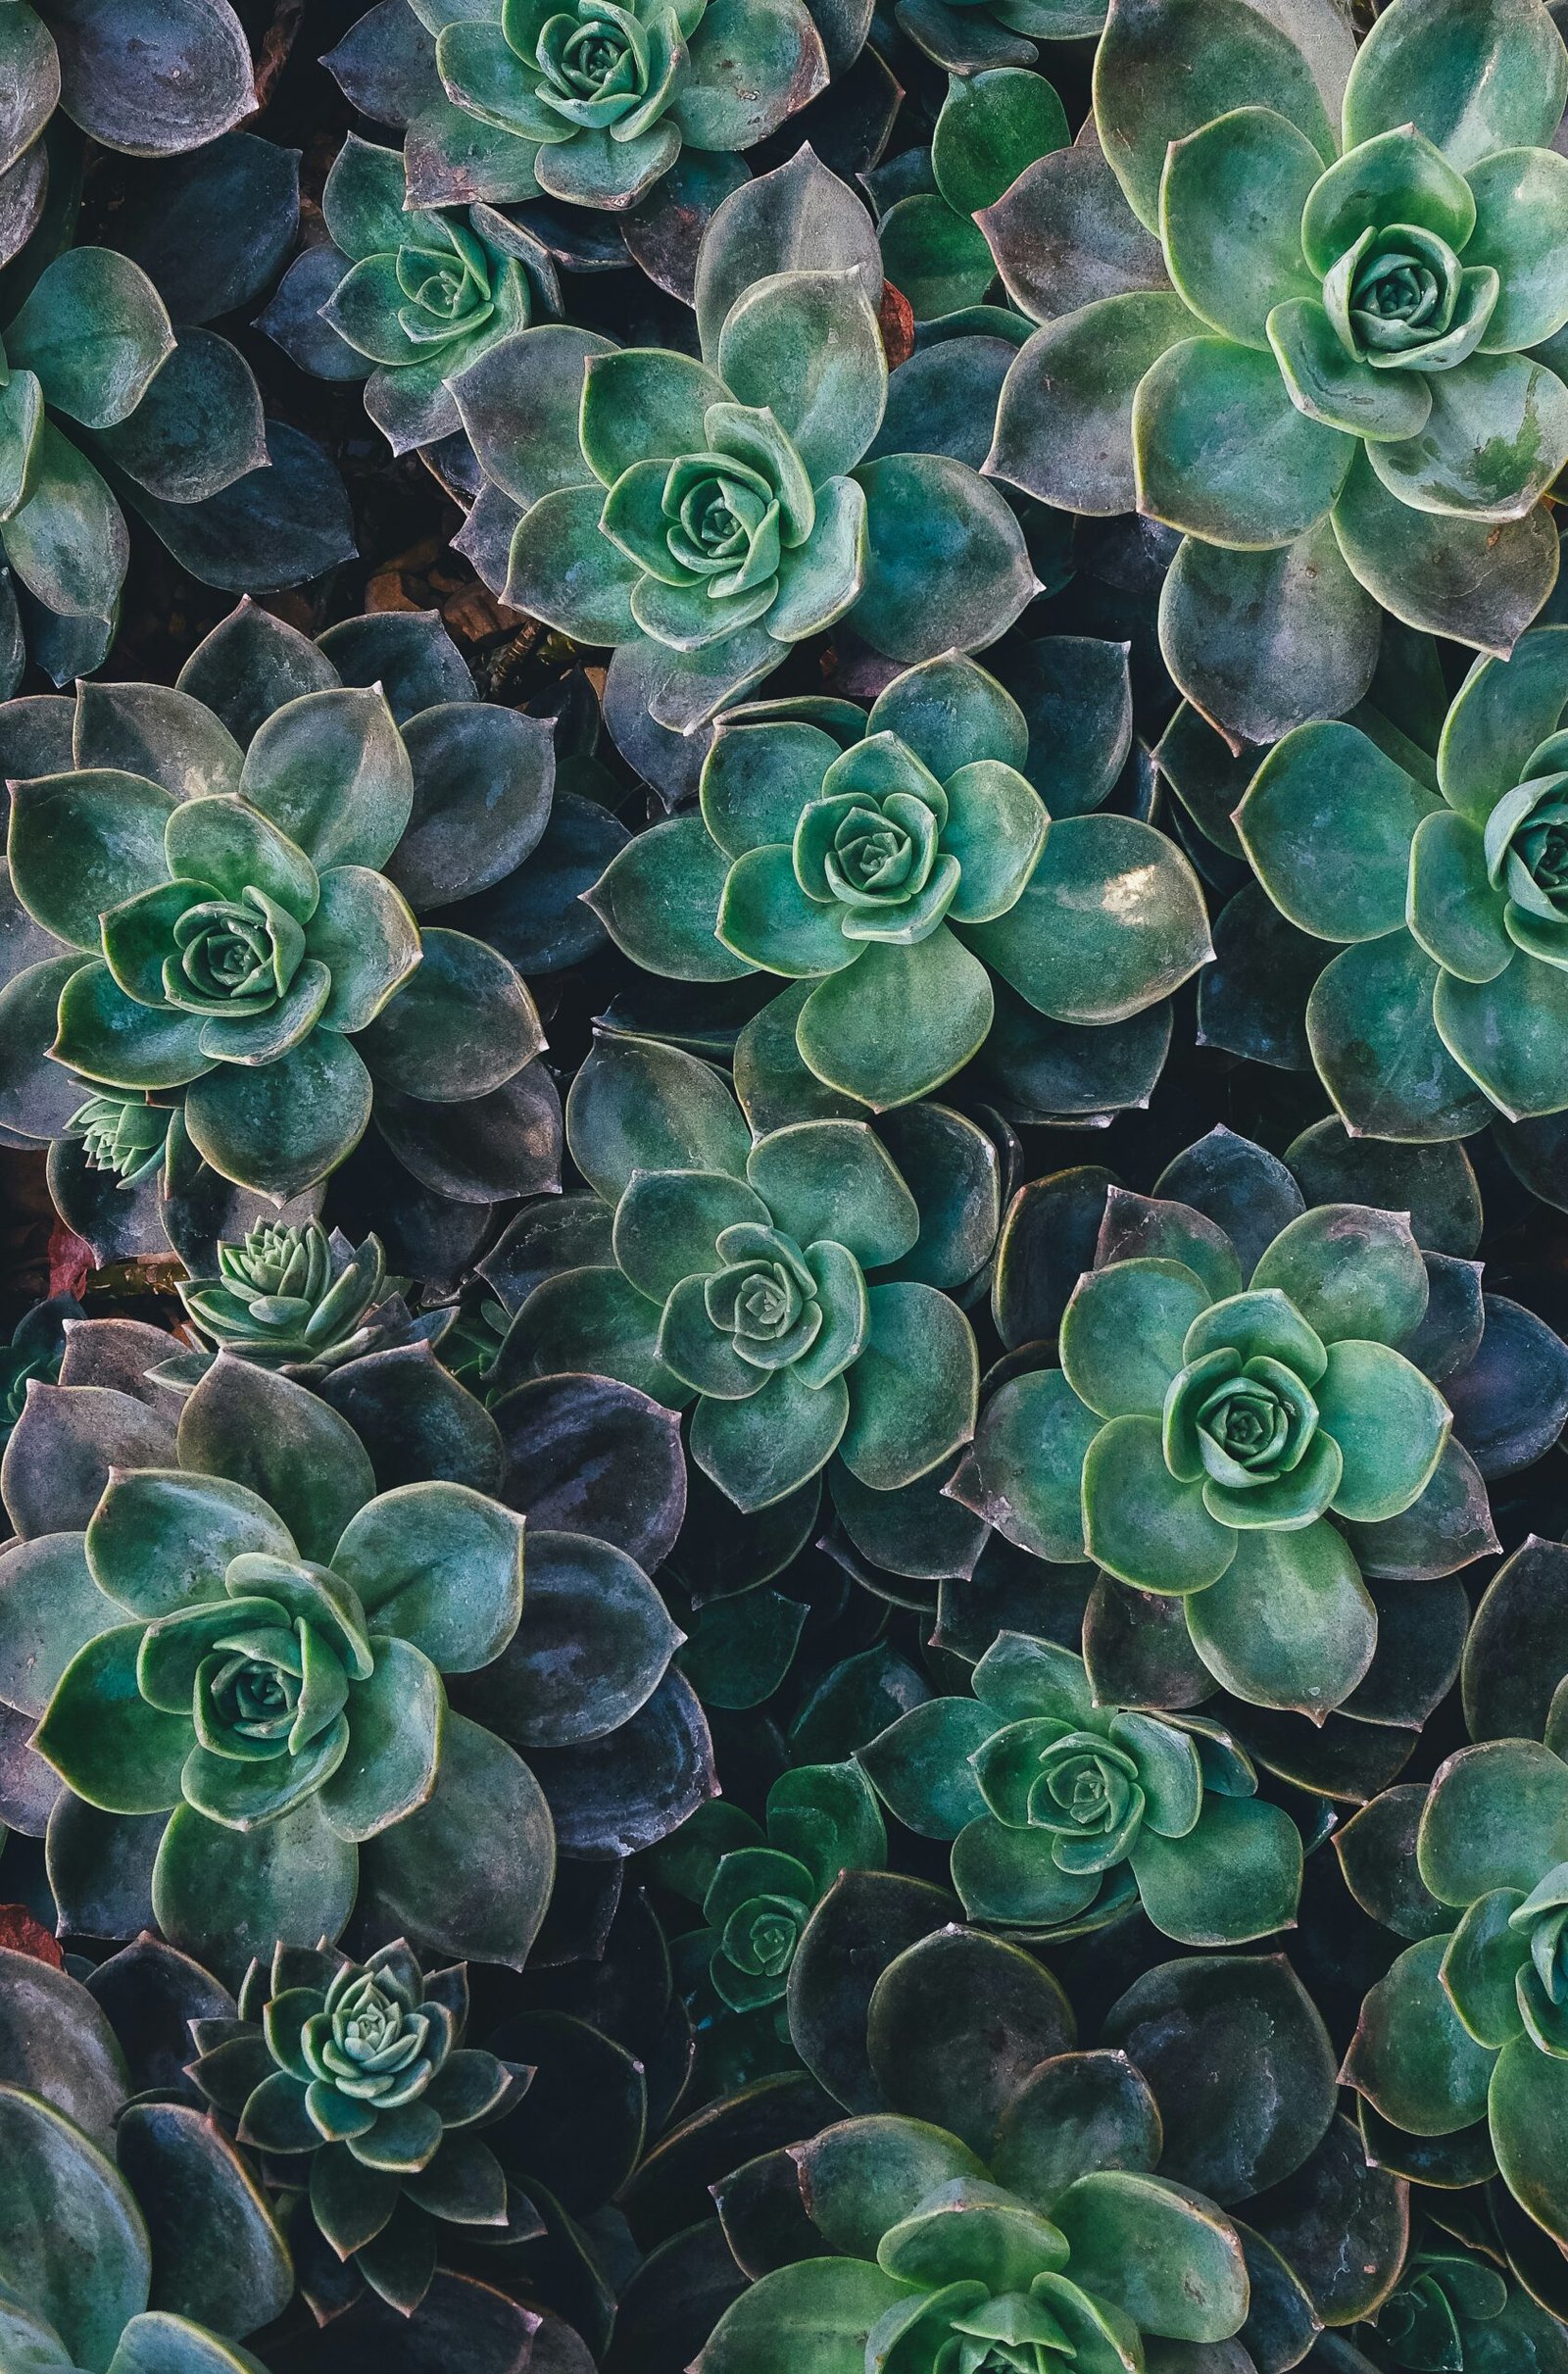
top view of green succulent plants

Succulents That Resemble Roses: A Beautiful Addition to Your Garden

One such succulent that closely resembles a rose is the Echeveria ‘Black Prince’. This stunning plant features rosettes of dark, deep purple leaves that mimic the rich color of a velvety rose. The edges of the leaves are highlighted with a delicate shade of green, creating a beautiful contrast that further enhances its rose-like appearance. When this succulent is in bloom, it produces tall, slender stalks adorned with vibrant orange flowers that add a pop of color to the overall display.

Another rose-like succulent is the Graptopetalum paraguayense, also known as the Ghost Plant. This succulent has thick, fleshy leaves that are arranged in a rosette formation, resembling the petals of a rose. The leaves are a powdery blue-gray color, giving the plant a ghostly appearance, hence its name. When exposed to bright sunlight, the edges of the leaves develop a pinkish hue, adding a touch of romance to its already enchanting look. The Ghost Plant also produces delicate, star-shaped flowers in shades of pink, white, or yellow, further enhancing its resemblance to a blooming rose.

For those looking for a more compact rose-like succulent, the Sedum spurium ‘Dragon’s Blood’ is an excellent choice. This low-growing plant forms tight clusters of rosettes with fleshy, deep red leaves that resemble the petals of a crimson rose. The foliage of the Dragon’s Blood Sedum intensifies in color during the cooler months, creating a dramatic display in the garden. In addition to its striking appearance, this succulent also produces small clusters of pink flowers that attract pollinators, adding life and movement to the garden.

Incorporating these rose-like succulents into your garden or indoor space can create a truly stunning and unique display. Whether you choose the dark and mysterious Echeveria ‘Black Prince’, the ethereal Ghost Plant, or the vibrant Dragon’s Blood Sedum, these succulents will undoubtedly add a touch of elegance and beauty to any setting. Their ability to thrive in various conditions and their low maintenance requirements make them an ideal choice for both experienced gardeners and beginners alike. So why not bring the beauty of roses into your garden with these captivating succulents?

1. Echeveria ‘Lola’

Echeveria ‘Lola’ is a stunning succulent that looks remarkably like a rose. Its rosette-shaped leaves are a beautiful shade of dusty pink with hints of lavender. The leaves are tightly packed, giving the plant a full and lush appearance. Echeveria ‘Lola’ is a slow-growing succulent that can reach a size of about 6 inches in diameter. It thrives in well-draining soil and requires bright, indirect sunlight to maintain its vibrant color.

Echeveria ‘Lola’ is a popular choice among succulent enthusiasts due to its unique and eye-catching appearance. The dusty pink color of its leaves adds a touch of elegance to any indoor or outdoor garden. This succulent is often used in floral arrangements and as a centerpiece in succulent gardens.

When it comes to care, Echeveria ‘Lola’ is relatively low-maintenance. It prefers well-draining soil to prevent root rot, so a mixture of potting soil and perlite or sand is ideal. It is important to water this succulent sparingly, allowing the soil to dry out completely between waterings. Overwatering can lead to root rot and other issues, so it’s best to err on the side of underwatering.

In terms of lighting, Echeveria ‘Lola’ thrives in bright, indirect sunlight. Placing it near a south-facing window or providing it with a few hours of morning sunlight can help it maintain its vibrant color. However, direct sunlight for extended periods can cause the leaves to burn, so it’s important to provide some shade during the hottest parts of the day.

Propagation of Echeveria ‘Lola’ is relatively easy. It can be propagated through leaf cuttings or by separating offsets, which are the small plants that grow at the base of the main rosette. Leaf cuttings should be allowed to callous over for a few days before being placed in well-draining soil. Offsets can be gently separated from the main plant and planted in their own pots.

Overall, Echeveria ‘Lola’ is a beautiful and versatile succulent that adds a touch of elegance to any garden or indoor space. With proper care and attention, this stunning succulent can thrive and bring joy to its owner for years to come.

2. Graptopetalum ‘Ghost Plant’

The Graptopetalum ‘Ghost Plant’ is another succulent that closely resembles a rose. Its leaves are a pale grayish-green color, giving it a ghostly appearance. The leaves grow in a rosette shape and have a slightly translucent quality, which adds to its ethereal beauty. The ‘Ghost Plant’ is a low-maintenance succulent that can tolerate a wide range of growing conditions. It thrives in bright, indirect sunlight and requires well-draining soil to prevent root rot.

The ‘Ghost Plant’ is native to Mexico and belongs to the Crassulaceae family. Its scientific name, Graptopetalum, is derived from the Greek words “graptos,” meaning “marked,” and “petalon,” meaning “leaf,” referring to the distinct markings on its leaves. Due to its distinctive appearance and simplicity of maintenance, this succulent is highly coveted by collectors and enthusiasts.

One of the most fascinating features of the ‘Ghost Plant’ is its ability to change color depending on the amount of sunlight it receives. In bright sunlight, the leaves take on a pinkish hue, while in shade or low light conditions, they become a more intense gray color. This color-changing characteristic adds to the plant’s allure and makes it a versatile addition to any succulent collection.

In addition to its aesthetic appeal, the ‘Ghost Plant’ also offers several practical benefits. Like other succulents, it is drought-tolerant and can survive extended periods without water. This makes it an excellent choice for those who may forget to water their plants regularly or live in arid climates. Furthermore, the plant’s ability to store water in its leaves allows it to withstand dry conditions and makes it an ideal candidate for xeriscaping, a landscaping technique that focuses on water conservation.

When it comes to propagation, the ‘Ghost Plant’ is relatively easy to grow from cuttings or offsets. Simply remove a healthy leaf or offset from the mother plant and allow it to callous over for a few days. Once calloused, place the cutting in well-draining soil and water sparingly until new roots and leaves begin to form. With proper care, the cutting will develop into a new ‘Ghost Plant’ and continue to thrive.

In conclusion, the Graptopetalum ‘Ghost Plant’ is a captivating succulent with its pale grayish-green leaves and rosette shape. Its ability to change color, low-maintenance nature, and drought tolerance make it a popular choice among succulent enthusiasts. Whether used as a centerpiece in a succulent arrangement or as a standalone plant, the ‘Ghost Plant’ is sure to add an ethereal touch to any garden or indoor space.

3. Sedum ‘Rose Carpet’

Sedum ‘Rose Carpet’ is a trailing succulent that resembles a cascading rose bush. Its leaves are a vibrant shade of green and grow in clusters along the stems. The leaves have a rounded shape and are slightly fleshy, giving them a plump appearance. ‘Rose Carpet’ is a fast-growing succulent that can spread up to 2 feet in width. It thrives in full sun and well-draining soil and is a perfect choice for hanging baskets or as ground cover in a garden.

When planted in hanging baskets, Sedum ‘Rose Carpet’ creates a stunning display as its cascading stems drape gracefully over the sides. The vibrant green leaves add a pop of color and texture to any space. This succulent is also an excellent choice for ground cover in a garden, as its fast growth and spreading habit quickly fill in empty spaces, creating a lush carpet of foliage.

One of the standout features of Sedum ‘Rose Carpet’ is its ability to thrive in full sun. This succulent is highly adaptable and can tolerate intense sunlight without scorching its leaves. In fact, it actually prefers bright, direct sunlight and may become leggy if grown in shade. Placing ‘Rose Carpet’ in a sunny spot will ensure that it maintains its vibrant green color and compact growth habit.

In addition to its sun-loving nature, Sedum ‘Rose Carpet’ also requires well-draining soil. This succulent is highly drought-tolerant and can withstand periods of dryness once established. However, it is important to avoid overwatering, as this can lead to root rot and other issues. A well-draining soil mixture, such as a combination of cactus potting mix and perlite, will provide the ideal growing conditions for ‘Rose Carpet’.

With its trailing habit and fast growth, Sedum ‘Rose Carpet’ is an excellent choice for hanging baskets or as ground cover in a garden. Its vibrant green leaves and cascading stems create a visually appealing display, while its ability to thrive in full sun and well-draining soil make it a low-maintenance option for both beginner and experienced gardeners. Whether used as a focal point in a hanging basket or as a lush carpet of foliage in a garden, ‘Rose Carpet’ is sure to add beauty and interest to any space.

Kalanchoe ‘Mother of Thousands’ is a fascinating succulent that captivates with its unique ability to reproduce. The plantlets that grow along the edges of its leaves resemble delicate roses, adding a touch of elegance to its overall appearance. The pale green color of the leaves perfectly complements the scalloped shape, creating a visually appealing contrast. As the plant matures, these miniature plantlets eventually detach from the mother plant and root themselves in the surrounding soil.

One of the most remarkable aspects of ‘Mother of Thousands’ is its ability to propagate so effortlessly. As the plantlets drop off, they quickly establish themselves in the soil, creating a dense and beautiful display of miniature plants. This natural process not only adds to the aesthetic appeal of the succulent but also offers an opportunity for gardeners to propagate and expand their collection.

When it comes to care, ‘Mother of Thousands’ thrives in bright, indirect sunlight. Placing it near a window or in a well-lit area of your home will ensure that it receives the necessary amount of light to grow and flourish. Additionally, providing well-draining soil is essential to prevent waterlogging, which can be detrimental to the plant’s health.

Overall, Kalanchoe ‘Mother of Thousands’ is a captivating succulent that offers a unique and visually stunning addition to any plant collection. Its ability to reproduce effortlessly and create a dense display of miniature plants is truly remarkable. With proper care and attention, this succulent will continue to thrive and bring joy to its caretaker for years to come.

5. Adenium ‘Desert Rose’

Adenium ‘Desert Rose’ is a succulent that not only looks like a rose but also bears flowers that resemble miniature roses. This succulent features a thick, swollen trunk and branches out into multiple stems. When in bloom, it produces stunning flowers in a variety of colors, including shades of pink, red, and white. ‘Desert Rose’ requires full sun and well-draining soil to thrive and is a perfect choice for those looking for a larger succulent that makes a statement.

Adenium ‘Desert Rose’ is a popular choice among succulent enthusiasts due to its unique and eye-catching appearance. Its thick and swollen trunk gives it a distinctive bonsai-like appearance, making it a great addition to any garden or indoor plant collection.

One of the most appealing features of ‘Desert Rose’ is its ability to produce flowers that closely resemble miniature roses. These flowers come in a wide range of colors, adding a burst of vibrant hues to any space. The shades of pink, red, and white are particularly stunning and can instantly brighten up a room or garden.

To ensure the healthy growth of Adenium ‘Desert Rose’, it is important to provide it with the right conditions. This succulent thrives in full sun, so it should be placed in a spot where it can receive at least six hours of direct sunlight each day. In terms of soil, ‘Desert Rose’ prefers well-draining soil that allows excess water to flow away quickly. This helps prevent root rot, which can be detrimental to the plant’s health.

In addition to its beauty, Adenium ‘Desert Rose’ is also known for its resilience. It can withstand periods of drought and is relatively low-maintenance compared to other flowering plants. However, it is important to note that ‘Desert Rose’ is not frost-tolerant and should be protected during colder months.

Overall, Adenium ‘Desert Rose’ is a stunning succulent that adds a touch of elegance to any space. Its rose-like flowers and unique trunk make it a standout choice for those looking to create a visually striking garden or indoor plant display. With the right care and attention, this succulent can thrive and bring joy to its owner for many years to come.

white and black ceramic mugs on brown wooden table

The Importance of Repotting Succulents

One of the main benefits of repotting succulents is that it promotes healthy growth. When a succulent outgrows its current pot, its roots become cramped and may start to circle around the base of the plant. This can lead to root rot and hinder the plant’s ability to absorb water and nutrients. By repotting, you give the succulent room to spread its roots and establish a stronger foundation.

Another advantage of repotting is that it allows you to refresh the soil. Over time, the soil in a succulent’s pot can become compacted and lose its ability to drain properly. This can lead to waterlogged roots and increase the risk of root rot. By repotting, you can replace the old soil with a fresh mix that provides better drainage and aeration for the plant.

Repotting also gives you the opportunity to inspect the roots and remove any pests or diseases that may be present. Succulents are susceptible to a variety of pests, including mealybugs, aphids, and spider mites. These pests can cause damage to the plant and hinder its growth. By carefully examining the roots during repotting, you can identify and eliminate any unwanted visitors.

Now that we’ve discussed the benefits of repotting succulents, let’s dive into a step-by-step guide on how to do it properly. Follow these instructions to ensure a successful repotting process:

  1. Choose the right time: The best time to repot succulents is during their active growing season, which is typically in the spring or early summer. Avoid repotting during the winter months when the plant is in its dormant phase.
  2. Select the appropriate pot: Choose a pot that is slightly larger than the current one, allowing room for the succulent to grow. Make sure the pot has drainage holes to prevent water from pooling at the bottom.
  3. Prepare the new soil: Use a well-draining soil mix specifically formulated for succulents. Avoid using regular potting soil, as it retains too much moisture.
  4. Remove the succulent from its current pot: Gently tap the sides of the pot to loosen the soil and carefully lift the plant out. If the roots are tightly packed, you may need to gently tease them apart.
  5. Inspect the roots: Take this opportunity to examine the roots for any signs of damage or pests. Trim away any dead or rotting roots with clean, sharp scissors.
  6. Place the succulent in the new pot: Fill the new pot with a layer of fresh soil and create a small hole in the center. Position the succulent in the hole, making sure the roots are spread out and not crowded.
  7. Backfill the pot with soil: Gently fill the space around the roots with the new soil mix, ensuring that the plant is stable and upright. Leave a small gap between the soil surface and the rim of the pot to allow for watering.
  8. Water the succulent: After repotting, give the succulent a thorough watering to help settle the soil and hydrate the roots. Allow the excess water to drain out of the pot.
  9. Place the succulent in a bright location: Once repotted, find a bright spot for your succulent where it can receive adequate sunlight. Avoid placing it in direct sunlight, as this can cause sunburn.
  10. Monitor and care for the succulent: Keep an eye on your repotted succulent and continue to provide the care it needs, including regular watering and occasional fertilization. Watch for signs of stress or overwatering and adjust your care routine accordingly.

By following these steps and repotting your succulents when needed, you can ensure their continued health and vitality. Remember, each succulent may have slightly different care requirements, so it’s important to research the specific needs of your plant to provide the best care possible.

4. Enhanced Aesthetic Appeal

Repotting succulents not only benefits their overall health but also enhances their aesthetic appeal. Over time, succulents can outgrow their pots, becoming top-heavy and unbalanced. By repotting them into a larger container, you can give them more space to spread out and grow, creating a fuller and more visually pleasing arrangement.

In addition, repotting allows you to experiment with different pot sizes, shapes, and materials, adding variety and interest to your succulent collection. You can choose pots that complement the colors and textures of your succulents, creating a visually harmonious display.

5. Propagation Opportunities

Repotting succulents presents an excellent opportunity for propagation. Many succulent species produce offsets or “pups” that can be separated from the main plant and potted individually. By carefully removing these offsets during the repotting process, you can expand your succulent collection without having to purchase new plants.

Propagation is not only a cost-effective way to grow your succulent garden, but it also allows you to share your love for succulents with friends and family. You can gift them with potted offsets, spreading the joy of these unique and resilient plants.

6. Long-Term Plant Health

Regular repotting is crucial for the long-term health of succulents. As they grow, succulents deplete the nutrients in their soil, making it essential to replenish these nutrients periodically. By repotting your succulents with fresh soil, you provide them with a nutrient-rich environment that supports their growth and overall well-being.

Furthermore, repotting allows you to address any issues that may arise, such as overcrowding or root damage. By giving your succulents the space and care they need, you can ensure their long-term survival and enjoy their beauty for years to come.

4. Overcrowding

If you notice that your succulent is growing too close to its neighboring plants or is overcrowded in its current pot, it’s time to repot. Overcrowding can lead to competition for resources, including sunlight, water, and nutrients. Repotting will give your succulent the room it needs to grow and keep other plants from overshadowing it.

5. Unhealthy Appearance

If your succulent is showing signs of decline, such as yellowing or wilting leaves, it may be a sign that it needs to be repotted. A cramped pot can restrict the plant’s root growth and hinder its ability to take up nutrients. By repotting, you can refresh the soil and provide the necessary conditions for your succulent to regain its health and vigor.

6. Root Rot

Root rot is a common problem in succulents that are kept in pots with poor drainage. If you notice a foul smell coming from the soil or black, mushy roots when you remove the plant from its pot, it’s a clear indication of root rot. Repotting your succulent in fresh, well-draining soil will help prevent further damage and allow the roots to recover.

How to Repot Succulents

Now that you know when to repot your succulents, let’s discuss how to do it properly:

1. Choose the Right Pot

When selecting a new pot for your succulent, opt for one that is slightly larger than its current pot. This will give the roots room to grow without overwhelming the plant. Ensure that the pot has drainage holes to prevent water from pooling and causing root rot.

2. Prepare the Soil

Use a well-draining soil mix specifically formulated for succulents. You can purchase a pre-made mix or create your own by combining equal parts of potting soil, perlite, and coarse sand. This will provide the ideal growing medium for your succulent.

3. Remove the Succulent from its Pot

Gently tap the sides of the pot to loosen the soil and carefully remove the succulent from its current pot. Be cautious not to damage the roots during this process. If the roots are tightly packed, you can use a clean tool, such as a small brush or your fingers, to gently untangle them.

4. Trim and Inspect the Roots

Inspect the roots for any signs of rot or damage. If you notice any unhealthy or mushy roots, trim them with a clean, sharp pair of scissors or pruning shears. This will help promote healthy root growth and prevent the spread of disease.

5. Repot the Succulent

Place a layer of fresh soil mix at the bottom of the new pot and position the succulent in the center. Gently fill in the gaps with more soil, ensuring that the roots are adequately covered. Avoid compacting the soil too tightly, as this can hinder drainage and root growth.

6. Allow the Succulent to Settle

After repotting, give your succulent some time to adjust to its new environment. Avoid watering it for a few days to allow any damaged roots to heal. Once the succulent has settled, resume your regular watering routine, ensuring that you don’t overwater.

By following these guidelines, you can ensure that your succulents stay healthy and thrive in their new pots. Remember to monitor their growth and repot as needed to provide them with the best possible growing conditions.
Step 8: Care After Repotting

After repotting, it’s essential to provide your succulent with the right care:

  • Place the newly repotted succulent in a spot with bright, indirect sunlight. Succulents thrive in bright light, but direct sunlight can scorch their leaves. Find a location near a window or in a well-lit room where they can receive the right amount of light.
  • Water the plant only when the top inch of soil feels dry. Succulents are desert plants that have adapted to survive in arid conditions. They store water in their leaves and stems, so they don’t need frequent watering. Overwatering can lead to root rot and other issues. Stick your finger into the soil to check the moisture level before watering.
  • Avoid overwatering, as succulents are prone to root rot. When watering, make sure to thoroughly soak the soil and allow the excess water to drain out of the pot. Never let your succulent sit in standing water, as this can cause the roots to rot. It’s better to underwater than overwater, as succulents can tolerate drought better than excessive moisture.
  • Monitor the plant for any signs of stress or disease and take appropriate action if needed. Keep an eye out for any changes in color, texture, or growth patterns. If you notice any yellowing leaves, mushy stems, or signs of pests, take immediate action to address the issue. Remove any affected parts and treat the plant with organic pest control methods if necessary.
  • Provide adequate airflow around the succulent. Good air circulation helps prevent the buildup of moisture and reduces the risk of fungal diseases. Avoid overcrowding your succulents and make sure they have enough space to breathe.
  • Feed your succulent with a balanced fertilizer during the growing season. Succulents have modest nutritional needs, so a diluted fertilizer solution applied once a month is sufficient. Use a fertilizer specifically formulated for succulents or a general-purpose houseplant fertilizer diluted to half strength.
  • Rotate your succulent periodically to ensure even growth. Succulents tend to grow towards the direction of the light source. Rotating them every few weeks will encourage balanced growth and prevent them from leaning or stretching towards one side.

By following these care instructions, your repotted succulent will have the best chance of thriving and growing into a healthy, beautiful plant. Remember to observe your succulent closely and make adjustments to its care routine as needed. With proper care, your succulent collection will continue to flourish and bring joy to your space.

green-leafed plant on teapot vase

The Beauty and Care Tips for String of Pearls Succulent

Introduction

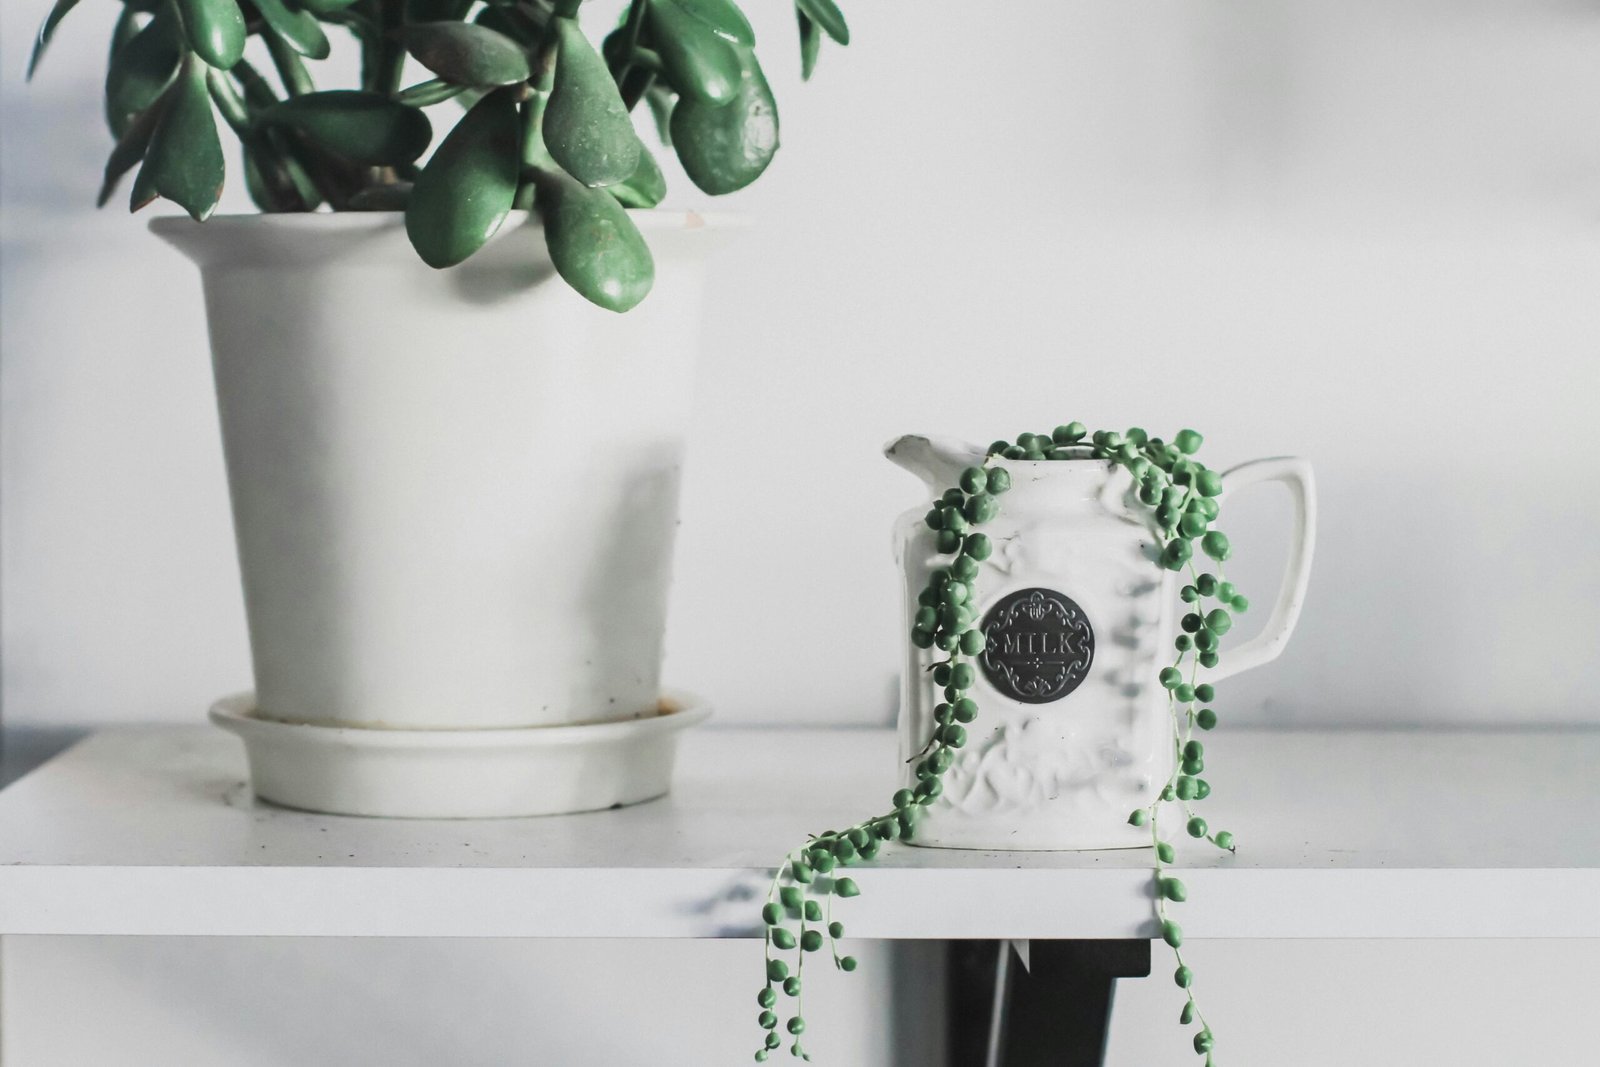
Succulents are a popular choice for indoor and outdoor gardening due to their unique appearance and low-maintenance nature. One such succulent that has gained popularity in recent years is the string of pearls (Senecio rowleyanus). Known for its cascading vines and round, bead-like leaves, this succulent is a favorite among plant enthusiasts. In this blog post, we will explore the beauty and care tips for the string of pearls succulent.

The string of pearls succulent, also known as the bead plant or rosary vine, is native to South Africa. Its trailing stems can grow up to two to three feet long, making it an ideal choice for hanging baskets or trailing over the edges of pots. The leaves of the string of pearls are small and spherical, resembling a string of green pearls, hence its name. These unique leaves store water, allowing the plant to survive in arid conditions.

One of the most striking features of the string of pearls is its delicate flowers. Small, white, star-shaped flowers bloom on the plant during the summer months, adding a touch of elegance to any garden or indoor space. These flowers are not only beautiful but also attract pollinators such as bees and butterflies.

When it comes to caring for the string of pearls succulent, it is important to provide the right conditions for its growth. This succulent thrives in bright, indirect light, so placing it near a window where it can receive filtered sunlight is ideal. Direct sunlight can scorch the leaves, so it is best to avoid placing the plant in a location with intense sunlight.

In terms of watering, the string of pearls has specific needs. As a succulent, it is adapted to survive in dry conditions and can store water in its leaves. Overwatering can lead to root rot and the death of the plant, so it is important to let the soil dry out between waterings. It is recommended to water the string of pearls thoroughly and then allow the soil to dry completely before watering again. During the winter months, when the plant is in its dormant phase, watering should be reduced to prevent overhydration.

Another important aspect of caring for the string of pearls succulent is its soil requirements. This succulent prefers well-draining soil that allows excess water to flow out easily. A mix of potting soil and perlite or sand can help create the right soil conditions for the string of pearls. Additionally, using a pot with drainage holes can prevent water from accumulating in the bottom, reducing the risk of root rot.

As with any plant, fertilizing the string of pearls can help promote healthy growth. However, this succulent does not require frequent fertilization. Applying a balanced, water-soluble fertilizer at half strength once a month during the spring and summer months is sufficient to provide the necessary nutrients. It is important to follow the instructions on the fertilizer packaging to avoid overfertilization, which can harm the plant.

In conclusion, the string of pearls succulent is a stunning addition to any garden or indoor space. Its cascading vines and round, bead-like leaves make it a unique and eye-catching plant. By providing the right conditions of light, water, soil, and occasional fertilization, you can ensure the health and beauty of your string of pearls succulent for years to come.

The beauty of the string of pearls succulent extends beyond its unique appearance. This plant offers a range of benefits that make it a popular choice among succulent enthusiasts. One of the key advantages of the string of pearls is its low maintenance requirements. This succulent is known for its ability to thrive in dry conditions, making it an ideal choice for those who may not have a green thumb or live in areas with limited water resources.

Additionally, the string of pearls succulent is a versatile plant that can be grown both indoors and outdoors. Its cascading growth habit makes it a perfect candidate for hanging baskets, where its trailing vines can create a stunning display. Placing the plant on elevated surfaces, such as shelves or window sills, can also enhance its visual appeal and allow its unique leaves to shine.

Not only does the string of pearls add a touch of whimsy to any space, but it also offers health benefits. Like other succulents, this plant has the ability to purify the air by removing toxins and releasing oxygen. This can help improve indoor air quality and create a healthier living environment.

Furthermore, the string of pearls succulent can be a great addition to a garden or outdoor space. Its trailing vines can be trained to grow along trellises or fences, adding a touch of elegance and greenery to any landscape. The plant’s ability to withstand drought and its resistance to pests and diseases make it a resilient choice for outdoor gardens.

In conclusion, the string of pearls succulent is not only visually appealing but also offers a range of benefits that make it a desirable plant for both indoor and outdoor spaces. Its unique appearance, low maintenance requirements, air-purifying abilities, and versatility make it a popular choice among plant enthusiasts. Whether grown in hanging baskets, placed on elevated surfaces, or incorporated into outdoor landscapes, the string of pearls succulent is sure to captivate and beautify any environment it graces.

Fertilizing

While the string of pearls succulent is relatively low-maintenance when it comes to fertilizing, providing it with some nutrients can help promote healthy growth. During the spring and summer months, you can fertilize your string of pearls every two to four weeks with a balanced, diluted fertilizer specifically formulated for succulents.

Be cautious not to over-fertilize, as this can lead to excessive growth and weaken the plant. Always follow the instructions on the fertilizer packaging and dilute it to half or quarter strength to avoid burning the delicate roots of the string of pearls.

Pruning and Propagation

Pruning is not typically necessary for the string of pearls succulent, but you can trim back any leggy or overgrown stems to encourage bushier growth. Use clean, sharp scissors or pruning shears to make clean cuts just above a leaf node.

If you wish to propagate your string of pearls, you can do so by taking stem cuttings. Simply cut a healthy stem with several leaf nodes, remove the bottom leaves, and allow the cutting to callus over for a few days. Then, place the cutting in a well-draining succulent mix and mist it lightly until roots develop.

Pests and Diseases

The string of pearls succulent is generally resistant to pests and diseases. However, it can occasionally be susceptible to mealybugs or scale insects. Inspect your plant regularly for any signs of infestation, such as sticky residue, tiny white bugs, or yellowing leaves.

If you notice any pests, you can remove them manually with a cotton swab dipped in rubbing alcohol or use an organic insecticidal soap. It’s important to treat the infestation promptly to prevent it from spreading to other plants.

Additionally, be mindful of overwatering, as it can lead to root rot and fungal diseases. Ensure proper drainage and avoid leaving the plant in standing water to minimize the risk of these issues.

By following these care tips, you can enjoy a thriving and beautiful string of pearls succulent in your home or garden. With its unique trailing foliage and delicate bead-like leaves, it is sure to be a stunning addition to any plant collection.

Propagation

If you want to expand your collection of string of pearls succulents or share them with friends, propagation is a simple and rewarding method. Here are two common methods of propagating string of pearls:

1. Stem Cuttings

To propagate string of pearls from stem cuttings, you will need to carefully select a healthy stem from the mother plant. Using a clean, sharp knife or scissors, cut the stem just below a set of leaves. It is important to ensure that the cutting is clean and free from any diseases or pests. Once the stem is cut, allow it to dry and callous for a few days. This step is crucial as it helps to prevent rotting when the cutting is placed in soil or water. After the cutting has calloused, you can then place it in well-draining soil or a glass of water. If you choose to use soil, make sure it is moist but not overly wet. If you opt for water propagation, ensure that the stem is partially submerged in the water. Over the course of a few weeks, you will start to see roots forming and new growth emerging from the cutting.

2. Division

Another method of propagating string of pearls is through division. This method involves carefully removing the string of pearls from its pot and gently separating the plant into smaller sections. It is important to ensure that each section has roots attached to promote successful growth. Once the plant has been divided, you can then plant the sections in individual pots with well-draining soil. When watering the newly potted divisions, be sure to water thoroughly but allow the soil to dry out between waterings. It is also important to place the newly potted divisions in a bright location to encourage healthy growth. As the divisions continue to grow, you should continue to care for them as you would for mature string of pearls plants, providing them with adequate sunlight, water, and occasional fertilization.

By using these propagation methods, you can easily expand your collection of string of pearls succulents and share their beauty with others. Whether you choose to propagate through stem cuttings or division, with a little patience and care, you can enjoy the satisfaction of watching new plants grow and thrive.

Common Pests and Problems

While the string of pearls succulent is generally pest-resistant, it can still encounter a few common problems. Here are some issues you may encounter when caring for this succulent:

1. Mealybugs

Mealybugs are small, white insects that can infest the string of pearls. They typically gather in the leaf axils and along the stems, sucking sap from the plant and causing damage. To treat a mealybug infestation, isolate the affected plant and remove the insects manually with a cotton swab dipped in rubbing alcohol. You can also use insecticidal soap or neem oil to control the infestation.

2. Overwatering

Overwatering is one of the most common problems when it comes to caring for succulents. If the string of pearls is overwatered, its leaves may become mushy and translucent. To prevent overwatering, ensure that the soil dries out between waterings and that the pot has proper drainage.

3. Root Rot

Root rot can occur if the string of pearls is consistently overwatered or if it sits in soggy soil. Signs of root rot include yellowing leaves, wilting, and a foul smell. To treat root rot, remove the affected plant from its pot, trim away any rotting roots, and repot it in fresh, well-draining soil.

Aside from these common problems, the string of pearls succulent may also face challenges such as sunburn, nutrient deficiencies, and temperature extremes. Sunburn can occur if the plant is suddenly exposed to intense sunlight without acclimatization. It manifests as brown or yellow patches on the leaves. To prevent sunburn, gradually introduce the plant to brighter light conditions. Nutrient deficiencies, particularly in iron and magnesium, can cause stunted growth and yellowing leaves. Fertilize the plant with a balanced succulent fertilizer to ensure it receives adequate nutrients. Lastly, temperature extremes can be detrimental to the string of pearls. It prefers temperatures between 60-75°F (15-24°C) and may suffer in excessively hot or cold conditions. Protect the plant from extreme temperatures by providing appropriate insulation or moving it indoors during extreme weather conditions.

top view of green succulent plants

Creating a Beautiful Terrarium with Succulents

Succulents are a diverse group of plants that have adapted to survive in arid environments. Their thick, fleshy leaves and stems store water, allowing them to withstand long periods of drought. This makes them an ideal choice for terrariums, as they require minimal watering and maintenance.

When creating a terrarium with succulents, it’s important to choose the right container. A glass container with a lid is ideal, as it creates a sealed environment that helps to retain moisture. The container should also have good drainage to prevent water from pooling at the bottom, which can lead to root rot.

Before adding the succulents, it’s important to prepare the terrarium. Start by adding a layer of gravel or small rocks at the bottom of the container. This will help with drainage and prevent the soil from becoming waterlogged. Next, add a layer of activated charcoal, which will help to filter the air and prevent any odors from developing.

Once the base is prepared, it’s time to add the soil. Succulents thrive in well-draining soil, so it’s important to use a mix specifically designed for cacti and succulents. This type of soil is typically sandy and provides the perfect balance of moisture retention and drainage.

Now it’s time to arrange the succulents in the terrarium. Start by placing the largest succulent in the center, and then add smaller succulents around it. Be sure to leave enough space between the plants to allow for growth. You can also add some decorative elements, such as small rocks or pieces of driftwood, to enhance the visual appeal of the terrarium.

After arranging the succulents, gently press them into the soil to ensure they are secure. Be careful not to damage the roots or stems. Once the succulents are in place, give them a light watering to help them settle into their new environment.

Finally, place the lid on the terrarium to create a humid environment. This will help to retain moisture and create a self-sustaining ecosystem. However, it’s important to monitor the terrarium regularly and remove the lid if you notice any signs of excessive moisture or condensation.

With proper care and maintenance, your succulent terrarium will thrive and become a beautiful addition to your home. Remember to place it in a location that receives bright, indirect sunlight, as succulents need ample light to grow and thrive. Enjoy the beauty and tranquility of your miniature succulent garden!

Choosing the Right Succulents

Before you start creating your terrarium, it’s important to choose the right succulents. There are many different types of succulents available, each with its own unique characteristics. Some popular succulents for terrariums include:

  • Echeveria: These rosette-shaped succulents come in a variety of colors, from pale green to deep purple. They are known for their thick, fleshy leaves and are an excellent choice for adding a pop of color to your terrarium.
  • Haworthia: Known for their striking geometric patterns, haworthias are a great addition to any terrarium. They have a wide range of shapes and sizes, making them versatile for different terrarium designs.
  • Sedum: With their trailing stems and delicate flowers, sedums add a touch of elegance to your terrarium. They are available in various shades of green and can create a cascading effect when planted in hanging terrariums.
  • Aloe: Aloe vera is not only a beautiful succulent but also has many medicinal properties. It has long, pointed leaves and can grow to be quite large, so it is best suited for larger terrariums or as a focal point in a smaller one.
  • Crassula: Also known as jade plants, crassulas have thick, fleshy leaves and are easy to care for. They come in a range of sizes and shapes, from compact rosettes to tall, tree-like forms. Crassulas are a popular choice for terrariums due to their low maintenance requirements.

When choosing succulents for your terrarium, consider their growth habits and sizes. Opt for a variety of shapes, colors, and textures to create an interesting and visually appealing arrangement. Mix tall and trailing succulents with compact ones to add depth and dimension to your terrarium. Additionally, consider the lighting conditions in your home and choose succulents that thrive in the available light. Some succulents prefer bright, indirect light, while others can tolerate lower light levels. By selecting the right succulents for your terrarium, you can create a beautiful and thriving miniature garden that will bring joy and greenery to your space.

Creating the Terrarium

Now that you have chosen your succulents, it’s time to create your terrarium. Here are the steps to follow:

  1. Choose the right container: Select a glass container with a lid or a glass vase with a wide opening. Make sure the container is clean and free of any dirt or debris.
  2. Add drainage: Succulents require well-draining soil to prevent root rot. Add a layer of small rocks or pebbles at the bottom of the container to create drainage.
  3. Add soil: Use a well-draining succulent soil mix or create your own by combining regular potting soil with perlite or sand. Fill the container with enough soil to cover the rocks.
  4. Plant the succulents: Remove the succulents from their pots and gently loosen the roots. Dig small holes in the soil and place the succulents, making sure to leave enough space between them for growth.
  5. Arrange the succulents: Once all the succulents are planted, you can arrange them according to your desired design. Consider the height and shape of each succulent to create a visually balanced arrangement.
  6. Add decorative elements: To enhance the visual appeal of your terrarium, you can add decorative elements such as small rocks, moss, or miniature figurines.
  7. Water sparingly: Succulents are drought-tolerant plants and do not require frequent watering. Water your terrarium sparingly, allowing the soil to dry out completely between waterings.
  8. Place in the right location: Succulents thrive in bright, indirect light. Place your terrarium in a location where it will receive adequate sunlight, but avoid placing it in direct sunlight, as this can cause the plants to burn.

Creating a terrarium can be a fun and rewarding project that allows you to showcase your creativity while adding a touch of nature to your home or office space. The first step in creating a terrarium is to choose the right container. Glass containers with lids or wide-opening glass vases are ideal for terrariums, as they provide a clear view of the plants inside and help create a mini greenhouse effect. It’s important to ensure that the container is clean and free of any dirt or debris before starting the terrarium-making process.

Once you have the container ready, the next step is to add drainage. Succulents require well-draining soil to prevent root rot, so it’s essential to create a layer of small rocks or pebbles at the bottom of the container. This layer will allow excess water to drain away from the roots, ensuring that the succulents stay healthy and happy.

After adding the drainage layer, it’s time to add the soil. Succulents thrive in well-draining soil, so it’s best to use a specialized succulent soil mix. However, if you don’t have access to succulent soil, you can create your own by combining regular potting soil with perlite or sand. Fill the container with enough soil to cover the rocks, ensuring that there is sufficient depth for the succulents’ roots to grow.

Now comes the exciting part—planting the succulents! Carefully remove the succulents from their pots and gently loosen the roots. Dig small holes in the soil and place the succulents, making sure to leave enough space between them for growth. It’s important to consider the height and shape of each succulent when arranging them to create a visually balanced and aesthetically pleasing terrarium.

To enhance the visual appeal of your terrarium, you can add decorative elements. Small rocks, moss, or miniature figurines can be placed strategically among the succulents to create a more captivating display. These decorative elements not only add visual interest but also provide additional texture and depth to the terrarium.

When it comes to watering your terrarium, remember that succulents are drought-tolerant plants and do not require frequent watering. Overwatering can lead to root rot and other issues, so it’s important to water your terrarium sparingly. Allow the soil to dry out completely between waterings, and only water when the top inch of soil feels dry to the touch.

Lastly, find the perfect location for your terrarium. Succulents thrive in bright, indirect light, so it’s crucial to place your terrarium in a spot where it will receive adequate sunlight. However, avoid placing it in direct sunlight, as this can cause the plants to burn. A well-lit area near a window or under a skylight is usually ideal for succulents.

By following these steps, you can create a beautiful and thriving succulent terrarium that will bring a touch of nature and serenity to your living space or workspace. Enjoy the process of creating your terrarium, and don’t forget to give your succulents the love and care they need to thrive!

Caring for Your Succulent Terrarium

Once your succulent terrarium is set up, it’s important to provide the right care to ensure its longevity. Here are some tips for caring for your succulent terrarium:

  • Water sparingly: As mentioned earlier, succulents do not require frequent watering. Overwatering can lead to root rot and the death of your plants. Water your terrarium only when the soil is completely dry. To check the moisture level, insert your finger about an inch into the soil. If it feels dry, it’s time to water. When watering, make sure to do it slowly and evenly, allowing the water to reach the roots without causing waterlogged soil.
  • Monitor light levels: While succulents need bright light, they should not be exposed to direct sunlight for long periods. Monitor the light levels in your terrarium and adjust its placement accordingly. If you notice that your succulents are stretching or leaning towards the light source, it may be an indication that they are not receiving enough light. In this case, you can consider using a grow light to supplement the natural light.
  • Prune and remove dead leaves: Regularly inspect your succulents for any dead or yellowing leaves. Gently remove them to maintain the health and appearance of your plants. Use a pair of clean, sharp scissors or pruning shears to make clean cuts near the base of the leaf. This will not only improve the aesthetic appeal of your terrarium but also prevent the spread of diseases.
  • Fertilize occasionally: Succulents do not require frequent fertilization, but you can use a balanced, diluted fertilizer once or twice a year to promote healthy growth. Choose a fertilizer specifically formulated for succulents and cacti, and follow the instructions on the packaging for the correct dilution ratio. Apply the fertilizer sparingly, as overfertilization can lead to excessive growth and weak plants.
  • Keep an eye out for pests: Succulents are generally resistant to pests, but it’s still important to keep an eye out for any signs of infestation. Common pests include mealybugs and spider mites. If you notice any pests, treat them promptly with organic insecticidal soap. Mix the soap with water according to the instructions on the product and spray it on the affected plants, making sure to cover both the top and bottom of the leaves. Repeat the treatment as necessary until the pests are eliminated.

By following these care tips, you can ensure that your succulent terrarium remains healthy and vibrant for years to come. Remember to observe your plants regularly and make adjustments as needed to create the optimal growing conditions for your succulents. With proper care, your terrarium will become a beautiful and low-maintenance centerpiece in your home or office.

top view of green succulent plants

Adding Beauty to Your Garden: Succulents with Flowers

Succulents are known for their unique and beautiful foliage, but did you know that some succulents also produce stunning flowers? These flowering succulents can add a whole new level of beauty to your garden. In this blog post, we will explore some popular succulents that bloom and provide tips on how to care for them.

Echeveria

Echeveria is a popular succulent that is beloved for its rosette-shaped leaves and vibrant flowers. These plants come in a variety of colors, including shades of pink, red, orange, and yellow. Echeveria flowers are usually bell-shaped and appear on long stalks above the foliage. They bloom in the spring and summer, attracting bees and butterflies to your garden.

To care for Echeveria, make sure to plant them in well-draining soil and provide them with plenty of sunlight. These succulents are drought-tolerant but will appreciate regular watering during the growing season. Avoid overwatering, as this can lead to root rot. Echeveria can be grown both indoors and outdoors, making them a versatile addition to any garden.

Kalanchoe

Kalanchoe is another popular succulent that produces beautiful flowers. These plants have thick, fleshy leaves and clusters of small, colorful flowers. Kalanchoe flowers come in shades of red, orange, pink, and yellow, and they bloom in the winter and spring. Their vibrant blooms can brighten up any garden or indoor space.

To care for Kalanchoe, plant them in well-draining soil and place them in a location with bright, indirect sunlight. These succulents prefer to dry out between waterings, so be careful not to overwater them. Kalanchoe can be grown as houseplants or outdoor plants, but they are not frost-tolerant, so make sure to bring them indoors if temperatures drop below freezing.

Aloe

Aloe is a well-known succulent that not only has medicinal properties but also produces beautiful flowers. Aloe flowers are tubular and appear on tall spikes above the plant’s spiky leaves. These flowers come in various colors, including shades of orange, red, and yellow. Aloe plants are known for attracting hummingbirds and bees to the garden.

To care for Aloe, plant them in well-draining soil and place them in a location with bright, indirect sunlight. These succulents are drought-tolerant and prefer to dry out between waterings. Aloe can be grown both indoors and outdoors, but they require protection from frost. If grown indoors, make sure to provide adequate airflow to prevent fungal diseases.

Adding flowering succulents to your garden can bring a burst of color and beauty to your outdoor space. Whether you choose Echeveria, Kalanchoe, Aloe, or any other flowering succulent, make sure to provide them with the proper care and conditions they need to thrive. With a little attention and care, your succulents will reward you with stunning blooms that will be the envy of your neighbors.

1. Echeveria

Echeveria is a genus of succulent plants that are native to the Americas. These plants are prized for their rosette-shaped leaves and vibrant flowers. Echeveria flowers come in a variety of colors, including shades of pink, orange, red, and yellow.

To encourage your Echeveria to bloom, make sure it is getting enough sunlight. These plants thrive in bright, indirect light. If your Echeveria is not receiving enough light, it may not produce flowers. Additionally, be sure to water your Echeveria sparingly, as overwatering can lead to root rot and prevent blooming.

Echeveria plants are relatively easy to care for and can be grown both indoors and outdoors. They are popular choices for succulent enthusiasts due to their unique and attractive appearance. One of the key factors in successfully growing Echeveria is providing them with the right amount of sunlight. These plants need bright, indirect light to thrive. Placing them near a window that receives a few hours of sunlight each day is ideal. However, be cautious of direct sunlight as it can scorch the leaves.
In addition to sunlight, proper watering is crucial for the health and blooming of Echeveria. These plants are drought-tolerant and prefer infrequent watering. It is important to allow the soil to dry out completely between waterings to prevent root rot. Overwatering can lead to yellowing leaves and even the death of the plant. A good rule of thumb is to water Echeveria when the top inch of soil feels dry to the touch.
Fertilizing Echeveria can also promote blooming. During the growing season, which is typically spring and summer, you can use a balanced, water-soluble fertilizer diluted to half strength. Apply the fertilizer once a month to provide the necessary nutrients for the plant to produce vibrant flowers. However, it is important to avoid over-fertilizing as it can lead to leggy growth and a decrease in blooming.
Lastly, Echeveria plants can benefit from occasional pruning. If you notice any dead or damaged leaves, remove them promptly to maintain the overall health and appearance of the plant. Pruning can also help promote new growth and encourage the development of more flower buds.
By following these care tips, you can ensure that your Echeveria plants not only have healthy foliage but also produce beautiful blooms. Whether you choose to grow them indoors as houseplants or in your garden, these succulents are sure to add a touch of elegance and color to any space.

2. Kalanchoe

Kalanchoe is another popular succulent that produces beautiful flowers. These plants are native to Madagascar and come in a wide range of colors, including red, orange, yellow, and pink. Kalanchoe flowers are often long-lasting and can brighten up any space.

To help your Kalanchoe bloom, place it in a location where it can receive bright, indirect light. Kalanchoe plants prefer well-draining soil, so be sure to use a potting mix specifically formulated for succulents. Water your Kalanchoe when the top inch of soil feels dry, but be careful not to overwater.

In addition to providing the right light and soil conditions, there are a few other factors to consider when caring for your Kalanchoe. One important aspect is temperature. Kalanchoe plants thrive in temperatures between 60 and 85 degrees Fahrenheit (15 to 29 degrees Celsius). It’s best to avoid extreme temperature fluctuations, as this can stress the plant and hinder its blooming process.

Another key factor to keep in mind is humidity. Kalanchoe plants prefer low to moderate humidity levels. If the air in your home is too dry, you can increase humidity around the plant by placing a tray of water nearby or using a humidifier. On the other hand, if the air is too humid, you may need to provide additional airflow to prevent the growth of mold or fungus.

When it comes to fertilizing your Kalanchoe, it’s best to do so sparingly. These plants do not require frequent fertilization, and excessive nutrients can actually harm them. Use a balanced, water-soluble fertilizer diluted to half strength and apply it every two to four weeks during the growing season. Be sure to follow the instructions on the fertilizer packaging for the best results.

Lastly, pruning can help promote healthy growth and encourage more blooms. If your Kalanchoe becomes leggy or starts to lose its shape, you can trim back the stems to maintain a more compact appearance. Pruning is best done in the spring or early summer when the plant is actively growing.

With proper care and attention, your Kalanchoe can continue to produce beautiful flowers year after year. Enjoy the vibrant colors and unique charm that this succulent brings to your indoor or outdoor space.

3. Sedum

Sedum is a large genus of flowering succulents that includes many different species. These plants are known for their fleshy leaves and clusters of star-shaped flowers. Sedum flowers can be white, yellow, pink, or red, depending on the species.

Sedum plants are generally easy to care for and can thrive in a variety of conditions. They prefer well-draining soil and should be watered when the top inch of soil feels dry. Sedum plants also benefit from regular pruning to encourage bushier growth and more abundant blooms.

When it comes to selecting the right Sedum species for your garden, there are many options to choose from. One popular choice is Sedum spectabile, also known as the showy stonecrop or ice plant. This variety features large clusters of pink flowers that bloom in late summer and attract butterflies and bees.
Another popular Sedum species is Sedum spurium, commonly known as the dragon’s blood stonecrop. This low-growing plant has vibrant red foliage and small pink flowers that bloom in early summer. It is a great choice for ground cover or rock gardens.
If you’re looking for a Sedum variety with unique foliage, consider Sedum morganianum, also known as the burro’s tail or donkey’s tail. This trailing succulent has long, trailing stems covered in plump, blue-green leaves. It is a great choice for hanging baskets or containers.
In addition to their aesthetic appeal, Sedum plants also have practical uses. Some species, such as Sedum acre, have medicinal properties and are used in traditional herbal remedies. Sedum plants are also known for their ability to attract pollinators, making them a valuable addition to any garden.
Overall, Sedum plants are versatile, low-maintenance, and offer a wide range of options for gardeners. Whether you’re looking for a pop of color, unique foliage, or a plant with medicinal properties, there is a Sedum species that will meet your needs. With proper care and attention, these succulents will thrive and add beauty to your outdoor space.

4. Crassula

Crassula, also known as jade plants, are popular succulents that are native to South Africa. These plants have thick, fleshy leaves and produce clusters of small, star-shaped flowers. Crassula flowers can be white, pink, or red.

To help your Crassula bloom, place it in a location where it can receive bright, indirect light. These plants prefer well-draining soil and should be watered when the top inch of soil feels dry. Avoid overwatering, as it can lead to root rot and prevent blooming.

In addition to proper lighting and watering, fertilizing your Crassula can also promote blooming. Use a balanced, water-soluble fertilizer formulated for succulents. During the active growing season, which is typically spring and summer, fertilize your Crassula every two to four weeks. Be sure to follow the instructions on the fertilizer packaging for the correct dilution ratio.

Pruning your Crassula can also encourage blooming. Remove any dead or yellowing leaves to improve air circulation and prevent the plant from wasting energy on maintaining unhealthy foliage. You can also pinch back the tips of the stems to promote branching and the development of more flower buds.

Temperature and humidity can also play a role in the blooming of your Crassula. These plants prefer temperatures between 65 and 75 degrees Fahrenheit (18 to 24 degrees Celsius) during the day and slightly cooler temperatures at night. Avoid exposing your Crassula to extreme temperature fluctuations, as it can stress the plant and inhibit blooming.

Lastly, be patient with your Crassula. Some varieties may take several years to reach maturity and start blooming. It’s important to provide consistent care and create favorable growing conditions to give your Crassula the best chance of producing beautiful flowers.

5. Aloe

Aloe vera is a well-known succulent that is prized for its medicinal properties. While most people are familiar with the gel inside the leaves, aloe plants also produce flowers. Aloe flowers are tubular and come in a variety of colors, including yellow, orange, and red.

To encourage your aloe plant to bloom, place it in a location where it can receive bright, indirect light. Aloe plants prefer well-draining soil and should be watered when the top inch of soil feels dry. However, be careful not to overwater, as it can lead to root rot.

When it comes to aloe vera, it is not just the flowers that are beneficial. The gel inside the leaves is known for its soothing properties and is commonly used to treat burns, cuts, and other skin ailments. The gel contains a variety of vitamins, minerals, and antioxidants that can help promote healing and reduce inflammation.

In addition to its medicinal uses, aloe vera is also a popular houseplant due to its low maintenance requirements. It is a drought-tolerant plant that can survive in a wide range of conditions. However, it is important to note that aloe vera is native to arid regions and is adapted to receiving infrequent but deep waterings. Therefore, it is best to err on the side of underwatering rather than overwatering.

When it comes to fertilizing aloe vera, less is more. These plants are not heavy feeders and can actually be harmed by excessive fertilizer. Aloe vera plants can be fertilized once or twice a year with a balanced, water-soluble fertilizer. It is important to dilute the fertilizer to half the recommended strength to avoid burning the plant’s sensitive roots.

In terms of propagation, aloe vera can be easily grown from offsets, which are small plantlets that form around the base of the mother plant. To propagate, carefully remove the offsets and allow them to dry for a day or two. Once dry, they can be planted in a well-draining soil mix and watered sparingly until they establish roots.

Overall, aloe vera is a versatile and beneficial plant to have in your home or garden. Whether you are looking to enjoy its vibrant flowers, harvest its healing gel, or simply appreciate its low-maintenance nature, aloe vera is sure to be a welcome addition to any plant collection.

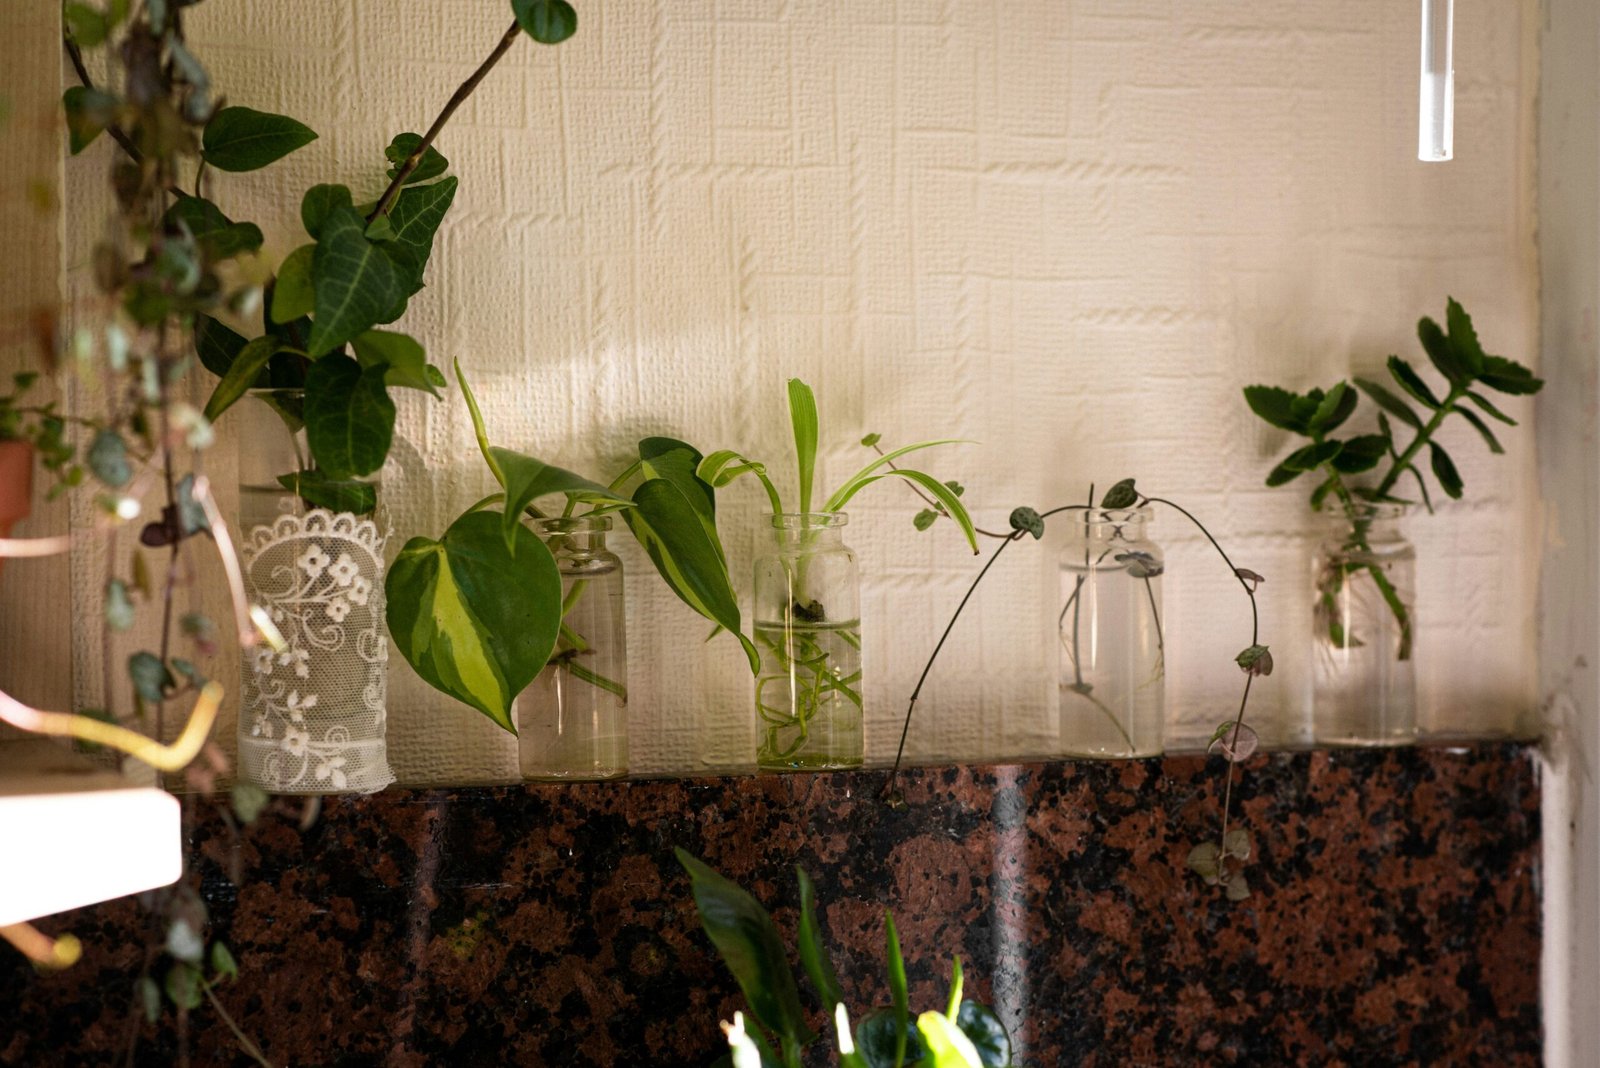
a group of plants in glass vases

A Beginner’s Guide to Succulent Propagation

Methods of Succulent Propagation

There are several methods of succulent propagation, each with its own advantages and challenges. Some of the most common methods include leaf propagation, stem propagation, and division.

Leaf Propagation

Leaf propagation is one of the easiest and most popular methods of propagating succulents. It involves removing a healthy leaf from a mature succulent plant and allowing it to develop roots and a new plant. To propagate succulents using this method, follow these steps:
1. Select a healthy leaf: Choose a mature leaf from a succulent plant that is plump and free from any signs of damage or disease.
2. Remove the leaf: Gently twist the leaf from the stem of the plant, ensuring that you remove the entire leaf without tearing it.
3. Allow the leaf to dry: Place the leaf in a warm, dry location and allow it to dry for a few days. This will help to prevent rotting when you plant it.
4. Plant the leaf: Once the leaf has dried, place it on top of well-draining soil in a small pot or tray. Make sure the end of the leaf that was attached to the stem is facing downwards.
5. Water sparingly: Water the leaf sparingly, just enough to keep the soil slightly moist. Overwatering can lead to rotting, so it’s important to be cautious.
6. Wait for roots to develop: After a few weeks, you should start to see roots forming from the base of the leaf. This is a sign that the leaf is successfully propagating.
7. Transplant the new plant: Once the roots have developed, you can carefully transplant the new plant into its own pot with well-draining soil. Be gentle when handling the delicate roots.

Stem Propagation

Stem propagation involves taking a stem cutting from a mature succulent plant and allowing it to develop roots and a new plant. This method is particularly useful for succulents that have a woody stem. To propagate succulents using this method, follow these steps:
1. Select a healthy stem: Choose a mature stem from a succulent plant that is long and healthy. Make sure to use a clean, sharp knife or pair of scissors to make a clean cut.
2. Allow the stem to dry: After cutting the stem, allow it to dry for a few days in a warm, dry location. This will help to prevent rotting when you plant it.
3. Plant the stem: Once the stem has dried, plant it in well-draining soil, making sure that at least one node is buried in the soil. Nodes are the areas on the stem where leaves or branches emerge.
4. Water sparingly: Water the stem sparingly, just enough to keep the soil slightly moist. Overwatering can lead to rotting, so it’s important to be cautious.
5. Wait for roots to develop: After a few weeks, you should start to see roots forming from the buried node. This is a sign that the stem is successfully propagating.
6. Transplant the new plant: Once the roots have developed, you can carefully transplant the new plant into its own pot with well-draining soil. Be gentle when handling the delicate roots.

Division

Division is a method of succulent propagation that involves separating a mature plant into smaller sections, each with its own roots and stems. This method is particularly useful for succulents that have multiple rosettes or clumping growth habits. To propagate succulents using this method, follow these steps:
1. Select a mature plant: Choose a mature succulent plant that has multiple rosettes or clumps of growth.
2. Remove the plant from its pot: Carefully remove the plant from its pot, taking care not to damage the roots or stems.
3. Divide the plant: Gently separate the plant into smaller sections, making sure that each section has its own roots and stems. You may need to use a clean, sharp knife or pair of scissors to make clean cuts.
4. Allow the sections to dry: After dividing the plant, allow the sections to dry for a few days in a warm, dry location. This will help to prevent rotting when you plant them.
5. Plant the sections: Once the sections have dried, plant them in their own pots with well-draining soil. Make sure to bury the roots and leave the stems exposed.
6. Water sparingly: Water the sections sparingly, just enough to keep the soil slightly moist. Overwatering can lead to rotting, so it’s important to be cautious.
7. Wait for new growth: After a few weeks, you should start to see new growth emerging from the sections. This is a sign that the sections are successfully propagating.
By following these methods of succulent propagation, you can expand your succulent collection and enjoy the satisfaction of growing your own plants. Whether you choose leaf propagation, stem propagation, or division, remember to be patient and provide the proper care and conditions for your new succulents to thrive. With time and care, you’ll be rewarded with a beautiful and diverse collection of succulents. Furthermore, propagating succulents can be a rewarding and fulfilling experience for plant lovers. It allows them to actively participate in the growth and development of their plants, witnessing the entire process from start to finish. From taking a leaf or a stem cutting to nurturing it until it develops roots and eventually grows into a new plant, the journey of propagation is filled with anticipation and excitement.
Moreover, propagating succulents can also serve as a means of preserving rare or endangered species. Many succulent species are threatened in their natural habitats due to habitat destruction and illegal collection. By propagating these plants, enthusiasts can contribute to their conservation efforts and ensure that these unique and beautiful species continue to thrive for future generations to appreciate.
In addition to the practical and conservation benefits, propagating succulents can also be a creative outlet for individuals. It allows them to experiment with different propagation methods, such as leaf propagation, stem propagation, or even grafting. Each method offers its own unique set of challenges and rewards, providing endless opportunities for succulent enthusiasts to explore and expand their knowledge.
Furthermore, propagating succulents can be a great way to share your love for these plants with others. Once you have successfully propagated your plants, you can gift them to friends, family, or fellow succulent enthusiasts. Not only does this allow you to spread the joy of succulents, but it also helps to foster a sense of community and connection among plant lovers.
Lastly, propagating succulents can be a therapeutic and calming activity. The process of caring for and nurturing plants has been proven to have numerous mental health benefits, including reducing stress, improving mood, and increasing feelings of well-being. Engaging in propagation can provide a sense of purpose and accomplishment, as well as a much-needed escape from the demands of everyday life.
In conclusion, the decision to propagate succulents offers a multitude of benefits. From cost-effectiveness and preservation of desirable traits to conservation efforts and creative expression, propagating succulents is a rewarding and enjoyable endeavor. Whether you are a seasoned succulent enthusiast or a beginner looking to explore this fascinating world, propagation is a valuable skill to acquire. So why not give it a try and embark on a journey of growth, connection, and beauty with your succulent plants?

Methods of Succulent Propagation

There are several methods you can use to propagate succulents, each with its own advantages and requirements. Let’s explore some of the most common methods:

Leaf Propagation

Leaf propagation is one of the most popular methods of propagating succulents. This method involves removing a healthy leaf from a mature succulent and allowing it to develop roots and grow into a new plant. Here’s how you can propagate succulents from leaves:
1. Select a healthy leaf: Choose a mature leaf from the succulent you wish to propagate. Make sure the leaf is plump and free from any signs of damage or disease.
2. Remove the leaf: Gently twist the leaf from the stem of the succulent, ensuring that the entire leaf is intact. Be careful not to damage the leaf or the stem during this process.
3. Let the leaf callus: Place the detached leaf in a dry and shaded area for a few days to allow it to callus. This step is crucial as it helps prevent the leaf from rotting when it is planted.
4. Plant the leaf: Once the leaf has callused, prepare a well-draining potting mix suitable for succulents. Insert the callused end of the leaf into the soil, burying it about half an inch. Water the soil lightly, being careful not to overwater.
5. Provide the right conditions: Place the potted leaf in a bright location with indirect sunlight. Avoid direct sunlight, as it can scorch the leaf. Water the soil sparingly, allowing it to dry out between waterings.
6. Wait for new growth: Over time, the leaf will develop roots and a new plantlet will emerge from the base of the leaf. Be patient, as this process can take several weeks to months, depending on the succulent species.
7. Transplant the new plant: Once the new plantlet has grown to a sufficient size, you can carefully remove it from the parent leaf and transplant it into its own pot. Treat it as you would any other mature succulent.

Stem Cutting Propagation

Another common method of succulent propagation is stem cutting. This method involves taking a cutting from the stem of a mature succulent and allowing it to develop roots and grow into a new plant. Here’s how you can propagate succulents from stem cuttings:
1. Select a healthy stem: Choose a mature stem from the succulent you wish to propagate. Look for a stem that is healthy, plump, and free from any signs of damage or disease.
2. Take a cutting: Using a clean and sharp pair of scissors or pruning shears, cut a section of the stem that is at least a few inches long. Make sure to make a clean cut, avoiding any jagged edges.
3. Let the cutting callus: Place the stem cutting in a dry and shaded area for a few days to allow it to callus. This step is important as it helps prevent the cut end from rotting when it is planted.
4. Plant the cutting: Once the cutting has callused, prepare a well-draining potting mix suitable for succulents. Insert the cut end of the stem into the soil, burying it about an inch or two. Water the soil lightly, being careful not to overwater.
5. Provide the right conditions: Place the potted cutting in a bright location with indirect sunlight. Avoid direct sunlight, as it can scorch the cutting. Water the soil sparingly, allowing it to dry out between waterings.
6. Wait for root development: Over time, the cutting will develop roots and new growth will emerge from the top of the stem. Be patient, as this process can take several weeks to months, depending on the succulent species.
7. Transplant the new plant: Once the cutting has established roots and new growth, you can carefully remove it from the pot and transplant it into its own container. Treat it as you would any other mature succulent.

Offsets or Pups Propagation

Many succulents produce offsets or pups, which are small plants that grow from the base of the parent plant. These offsets can be easily separated from the parent plant and grown into new individual plants. Here’s how you can propagate succulents from offsets or pups:
1. Identify the offsets: Examine the base of the parent plant and look for small plants that are growing from the sides or underneath. These are the offsets or pups that can be propagated.
2. Separate the offsets: Gently remove the offsets from the parent plant by carefully pulling them away or using a clean and sharp knife or scissors to cut them off. Make sure to keep the roots intact.
3. Let the offsets callus: Place the separated offsets in a dry and shaded area for a few days to allow them to callus. This step is important as it helps prevent the cut ends from rotting when they are planted.
4. Plant the offsets: Once the offsets have callused, prepare a well-draining potting mix suitable for succulents. Insert the roots of the offsets into the soil, burying them about half an inch. Water the soil lightly, being careful not to overwater.
5. Provide the right conditions: Place the potted offsets in a bright location with indirect sunlight. Avoid direct sunlight, as it can scorch the offsets. Water the soil sparingly, allowing it to dry out between waterings.
6. Wait for new growth: Over time, the offsets will develop roots and new growth will emerge from the center of each plant. Be patient, as this process can take several weeks to months, depending on the succulent species.
7. Transplant the new plants: Once the offsets have established roots and new growth, you can carefully remove them from the pot and transplant them into their own containers. Treat them as you would any other mature succulent.
By using these propagation methods, you can easily expand your succulent collection and enjoy the satisfaction of growing new plants from existing ones. Whether you choose leaf propagation, stem cutting propagation, or offsets propagation, remember to provide the right conditions and be patient as your succulents take root and grow into beautiful, thriving plants. 6. Monitor temperature and humidity: Succulents thrive in warm and dry conditions, so it’s important to keep an eye on the temperature and humidity levels in your propagation area. Most succulents prefer temperatures between 60 and 80 degrees Fahrenheit (15 to 27 degrees Celsius) and humidity levels between 30% and 50%. Avoid exposing your propagated succulents to extreme temperature fluctuations or high humidity, as this can lead to rot or fungal infections.
7. Choose the right propagation method: There are several methods you can use to propagate succulents, including leaf cuttings, stem cuttings, and division. Each method has its own requirements and success rate, so it’s important to choose the method that is most suitable for the specific succulent species you are propagating. Research the best propagation method for your succulents and follow the proper techniques to increase your chances of success.
8. Provide proper ventilation: Good air circulation is essential for the health of your propagated succulents. Stagnant air can lead to the development of mold, mildew, or fungal diseases. Make sure your propagation area is well-ventilated, either by placing a fan nearby or by opening windows to allow fresh air to circulate. This will help prevent the buildup of excess moisture and keep your succulents healthy.
9. Avoid overcrowding: When propagating succulents, it’s important to give each plant enough space to grow and develop. Overcrowding can lead to competition for resources and increased risk of disease or pest infestation. Make sure to space out your propagated succulents properly, allowing enough room for each plant to thrive. If necessary, transfer them to larger containers as they grow to ensure they have enough space.
10. Practice proper hygiene: To prevent the spread of diseases or pests, it’s important to practice good hygiene when propagating succulents. Clean your tools, such as scissors or knives, before and after each use to avoid transmitting any pathogens. Additionally, remove any dead leaves or plant debris from the propagation area regularly to minimize the risk of fungal infections. By maintaining cleanliness and practicing good hygiene, you can help ensure the health and success of your propagated succulents.
Remember, successful succulent propagation takes time, patience, and attention to detail. By following these tips and providing the proper care, you can enjoy the satisfaction of watching your succulents grow and thrive.

a close up of a plant

The Fascinating World of Succulent Jade Plants: Characteristics, Care Tips, and Propagation

Characteristics of Jade Plants

Jade plants, also known as Crassula ovata, are native to South Africa and Mozambique. They belong to the Crassulaceae family, which includes a diverse range of succulent plants. Jade plants are known for their thick, fleshy leaves that are oval-shaped and have a glossy, jade green color. The leaves are arranged in pairs along the branches, giving the plant a symmetrical and compact appearance.

One of the most distinctive features of jade plants is their ability to store water in their leaves and stems, making them highly drought-tolerant. This adaptation allows them to survive in arid conditions and makes them an excellent choice for those who tend to forget to water their plants regularly. The ability to store water also gives the leaves a plump and firm texture, which adds to their visual appeal.

Jade plants can grow up to three feet tall and have a tree-like appearance when mature. Their branches are thick and sturdy, capable of supporting the weight of the leaves. The trunk of a jade plant is often thick and woody, adding to its overall robustness. The plant’s growth is relatively slow, which means it can be kept in a small pot for an extended period without the need for frequent repotting.

In addition to their attractive foliage, jade plants produce small, star-shaped flowers in clusters. The flowers are usually white or pale pink and appear during the late winter or early spring. While the flowers are not the main attraction of jade plants, they add a touch of beauty to the overall aesthetic.

Jade plants are popular houseplants because of their unique characteristics and low maintenance requirements. One of the most notable features of jade plants is their ability to store water in their thick, fleshy leaves. This adaptation allows them to survive in arid conditions and makes them highly drought-tolerant. As a result, jade plants are an excellent choice for those who tend to forget to water their plants regularly.
In addition to their water-storing capabilities, jade plants are also known for their longevity. With proper care, these plants can live for decades, becoming cherished family heirlooms that are passed down from generation to generation. Their slow growth rate contributes to their longevity, as they only require repotting every few years.
Another characteristic that makes jade plants stand out is their ability to thrive in a wide range of light conditions. While they prefer bright, indirect light, they can tolerate lower light levels, making them suitable for various indoor environments. However, it is important to note that too much direct sunlight can scorch their leaves, so it is best to provide them with filtered light or place them near a window with a sheer curtain.
Jade plants are also relatively pest-resistant, making them an ideal choice for those who want a hassle-free plant. However, they can occasionally attract mealybugs or spider mites, especially if they are not given proper air circulation or if the humidity levels are too high. Regularly inspecting the leaves and treating any infestations promptly can help keep these pests at bay.
Overall, jade plants are a beautiful addition to any indoor space. Their unique appearance, low maintenance requirements, and ability to thrive in various light conditions make them a favorite among plant enthusiasts. Whether you are a seasoned gardener or a beginner, a jade plant is sure to bring a touch of natural beauty to your home or office.

Caring for Succulent Jade Plants

One of the reasons why jade plants are so popular is because they are relatively easy to care for. Here are some tips to help you keep your succulent jade plant happy and healthy:

Light

Jade plants thrive in bright, indirect light. Place your plant near a window that receives plenty of sunlight, but make sure to protect it from direct sunlight, as this can scorch the leaves. If you notice that your jade plant’s leaves are turning yellow or brown, it may be receiving too much sunlight.

On the other hand, if you notice that your jade plant’s leaves are stretching or leaning towards the light source, it may be an indication that it is not receiving enough light. In this case, you can consider using artificial grow lights to supplement the natural light.

Watering

When it comes to watering jade plants, less is more. These succulents have adapted to survive in arid conditions, so they prefer to be slightly underwatered rather than overwatered. Allow the soil to dry out completely between waterings, and make sure to use a well-draining potting mix to prevent root rot.

During the winter months, when the plant is in its dormant phase, reduce watering even further. Overwatering during this time can lead to root rot and other issues. It’s important to note that jade plants are more tolerant of underwatering than overwatering, so it’s better to err on the side of caution and water less frequently.

Temperature and Humidity

Jade plants are native to warm, arid regions, so they prefer temperatures between 65-75°F (18-24°C). They can tolerate slightly cooler temperatures, but it’s best to keep them away from drafts and extreme temperature fluctuations.

As for humidity, jade plants are not picky and can tolerate a wide range of humidity levels. However, they may benefit from a boost in humidity during the dry winter months, especially if you are using indoor heating. You can increase humidity by placing a tray of water near the plant or using a humidifier.

Pruning and Propagation

Pruning is not necessary for jade plants, but you can trim them to maintain their shape or remove any dead or damaged leaves. If you want to propagate your jade plant, you can do so easily by taking stem cuttings.

To propagate a jade plant, simply cut a healthy stem from the main plant and allow it to dry for a few days. Once the cut end has calloused over, you can plant it in a well-draining potting mix and water sparingly. Within a few weeks, roots will start to form, and a new plant will begin to grow.

Propagation is a great way to expand your collection of jade plants or share them with friends and family. It’s also a fun and rewarding way to connect with nature and learn more about the fascinating process of plant reproduction.

Common Issues and How to Solve Them

While jade plants are generally hardy and resilient, they can still face some common issues. Here are a few problems you may encounter and how to solve them:

Overwatering

Overwatering is the most common issue faced by jade plant owners. If you notice that the leaves are turning yellow or the stem is becoming soft and mushy, it’s a sign of overwatering. To solve this issue, reduce the frequency of watering and make sure that the potting mix is well-draining. Avoid watering the plant until the top inch of soil is dry to the touch. Additionally, ensure that the pot has drainage holes to allow excess water to escape. If the roots have become waterlogged, you may need to repot the plant in fresh, well-draining soil.

Pests

Jade plants are relatively resistant to pests, but they can still attract mealybugs and spider mites. If you notice small, cotton-like clusters or webbing on your plant, it’s a sign of an infestation. To get rid of pests, you can gently wipe the leaves with a damp cloth to remove any visible bugs or eggs. For more severe infestations, you can use an insecticidal soap or neem oil spray. Be sure to follow the instructions on the product label and repeat the treatment as necessary to completely eliminate the pests.

Leaf Drop

If your jade plant starts losing leaves, it may be due to environmental stress or a sudden change in conditions. Make sure that your plant is receiving adequate light, water, and temperature. Jade plants thrive in bright, indirect sunlight, so ensure that they are placed near a window with filtered light. Avoid exposing them to direct sunlight, as it can scorch the leaves. In terms of watering, maintain a consistent watering schedule and avoid drastic fluctuations in soil moisture. Finally, jade plants prefer temperatures between 65 and 75°F (18 and 24°C), so keep them away from drafts or extreme temperature changes. If you have recently moved the plant to a new location or changed its environment, give it some time to adjust and monitor its progress. It’s normal for jade plants to shed a few leaves, especially during the winter months, but excessive leaf drop may indicate an underlying issue such as root rot or nutrient deficiency. In such cases, it’s best to consult a plant expert for further guidance.